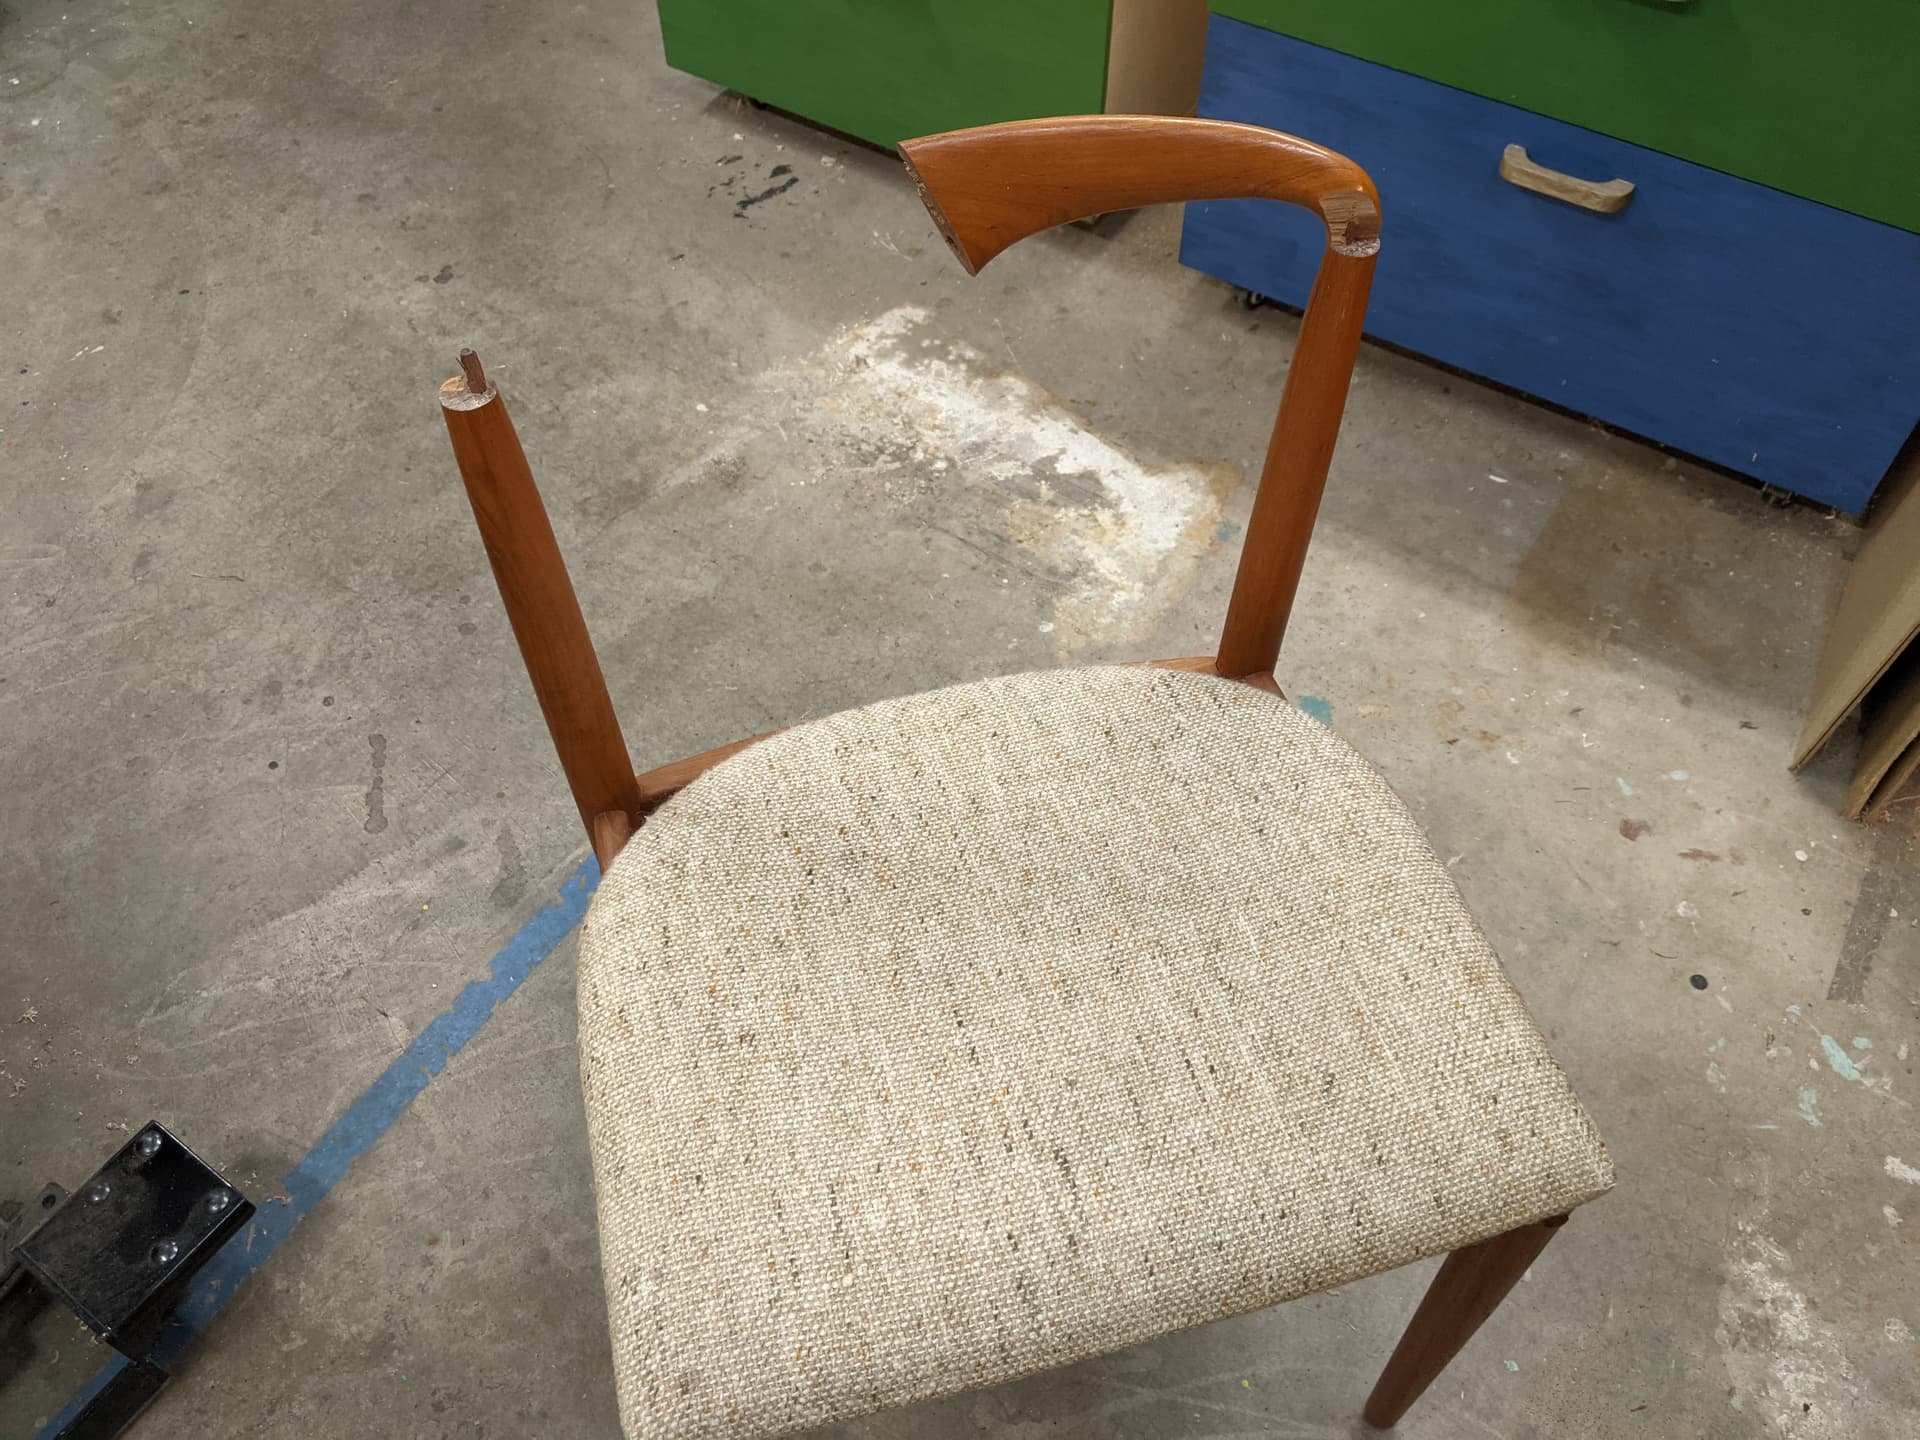
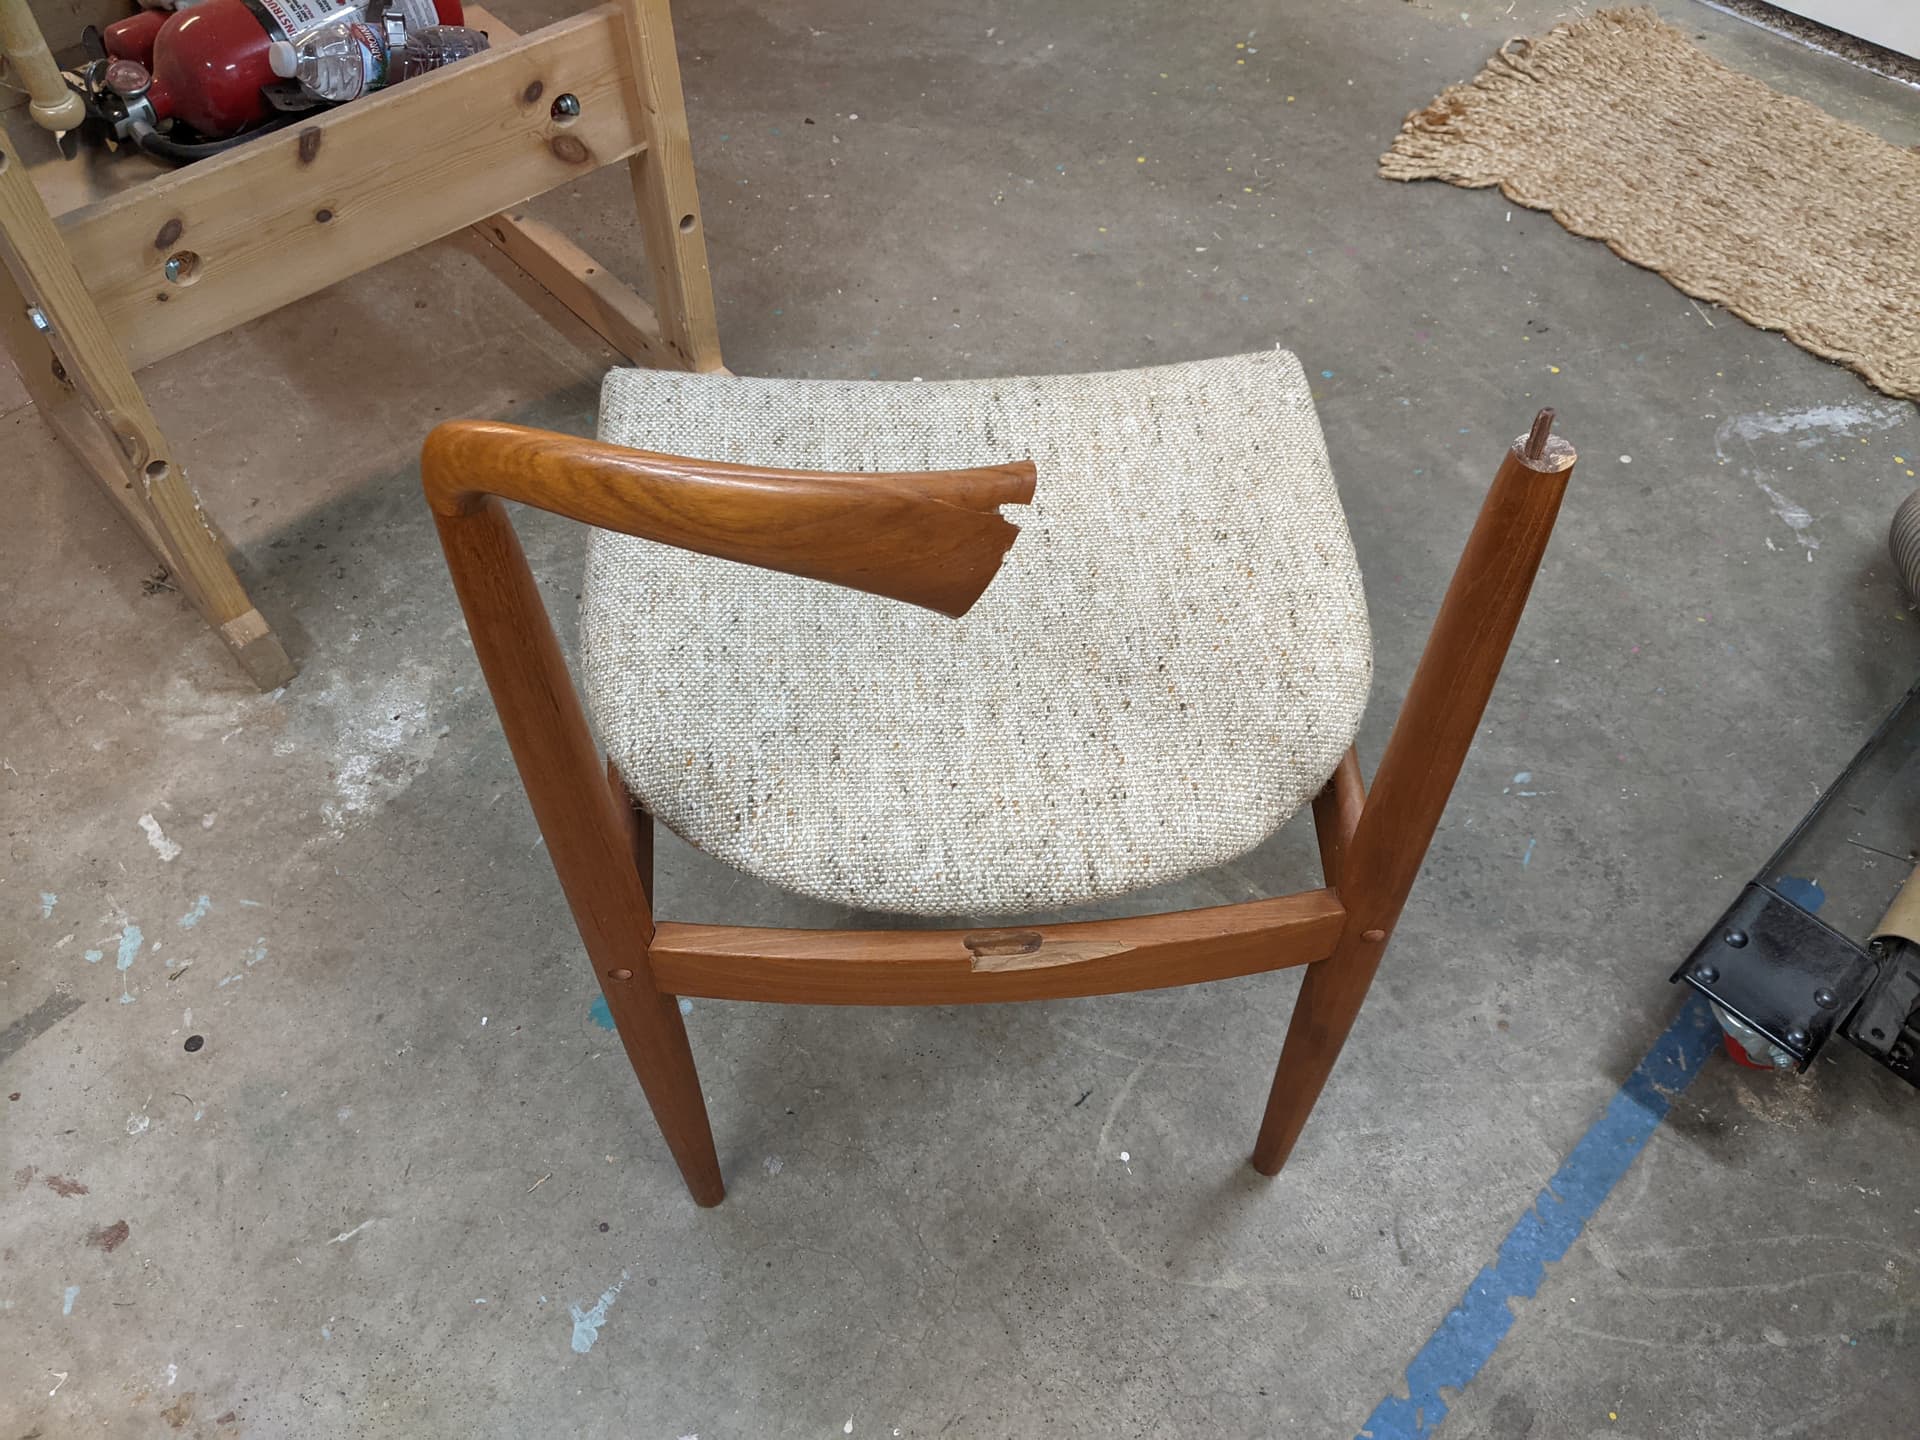
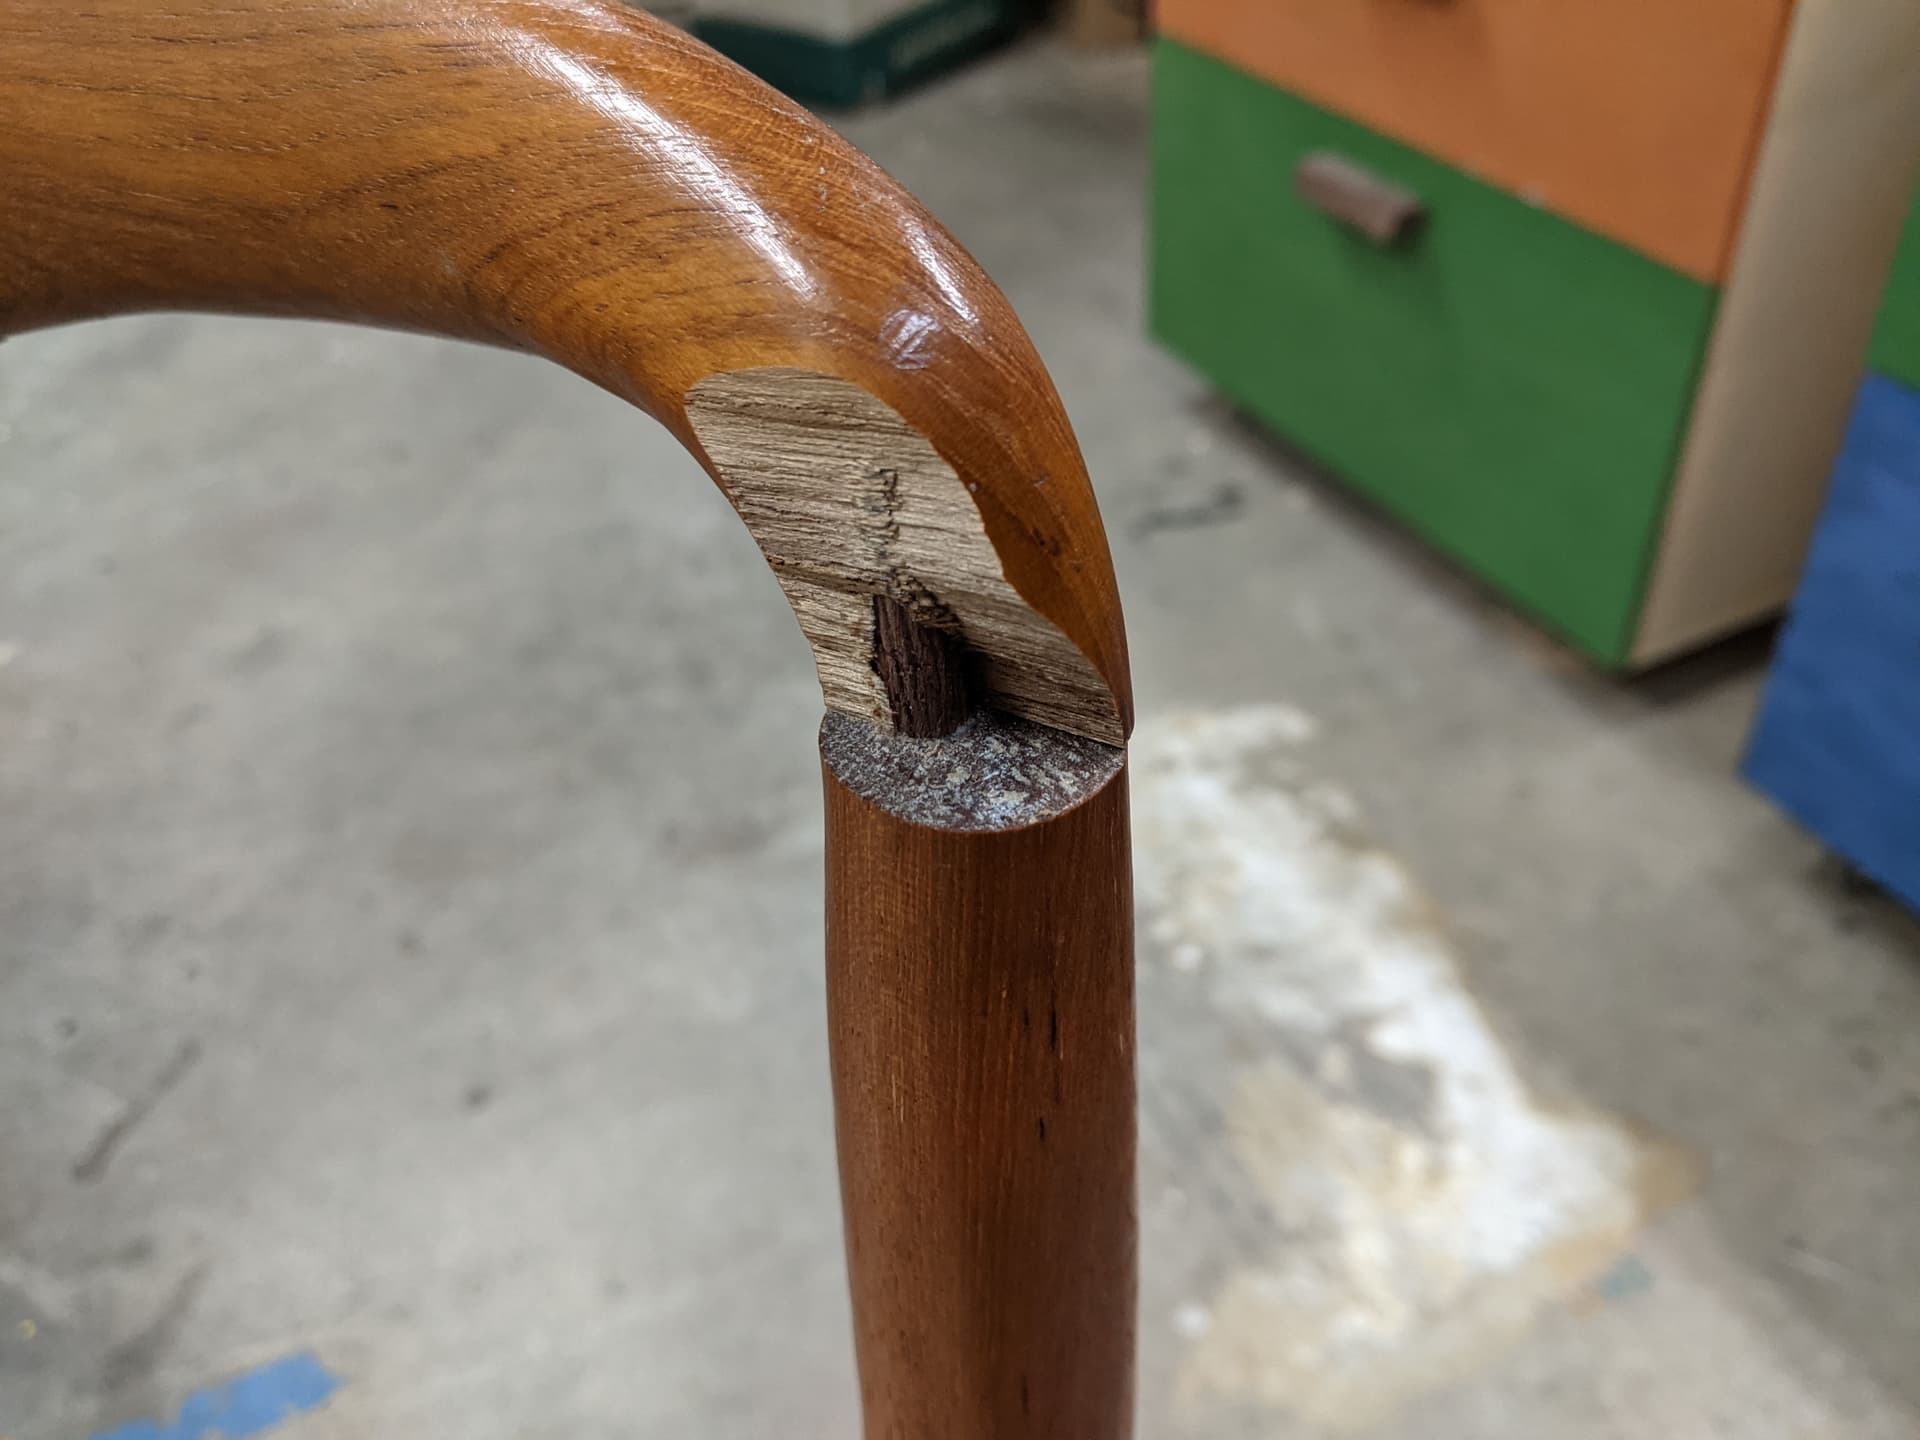
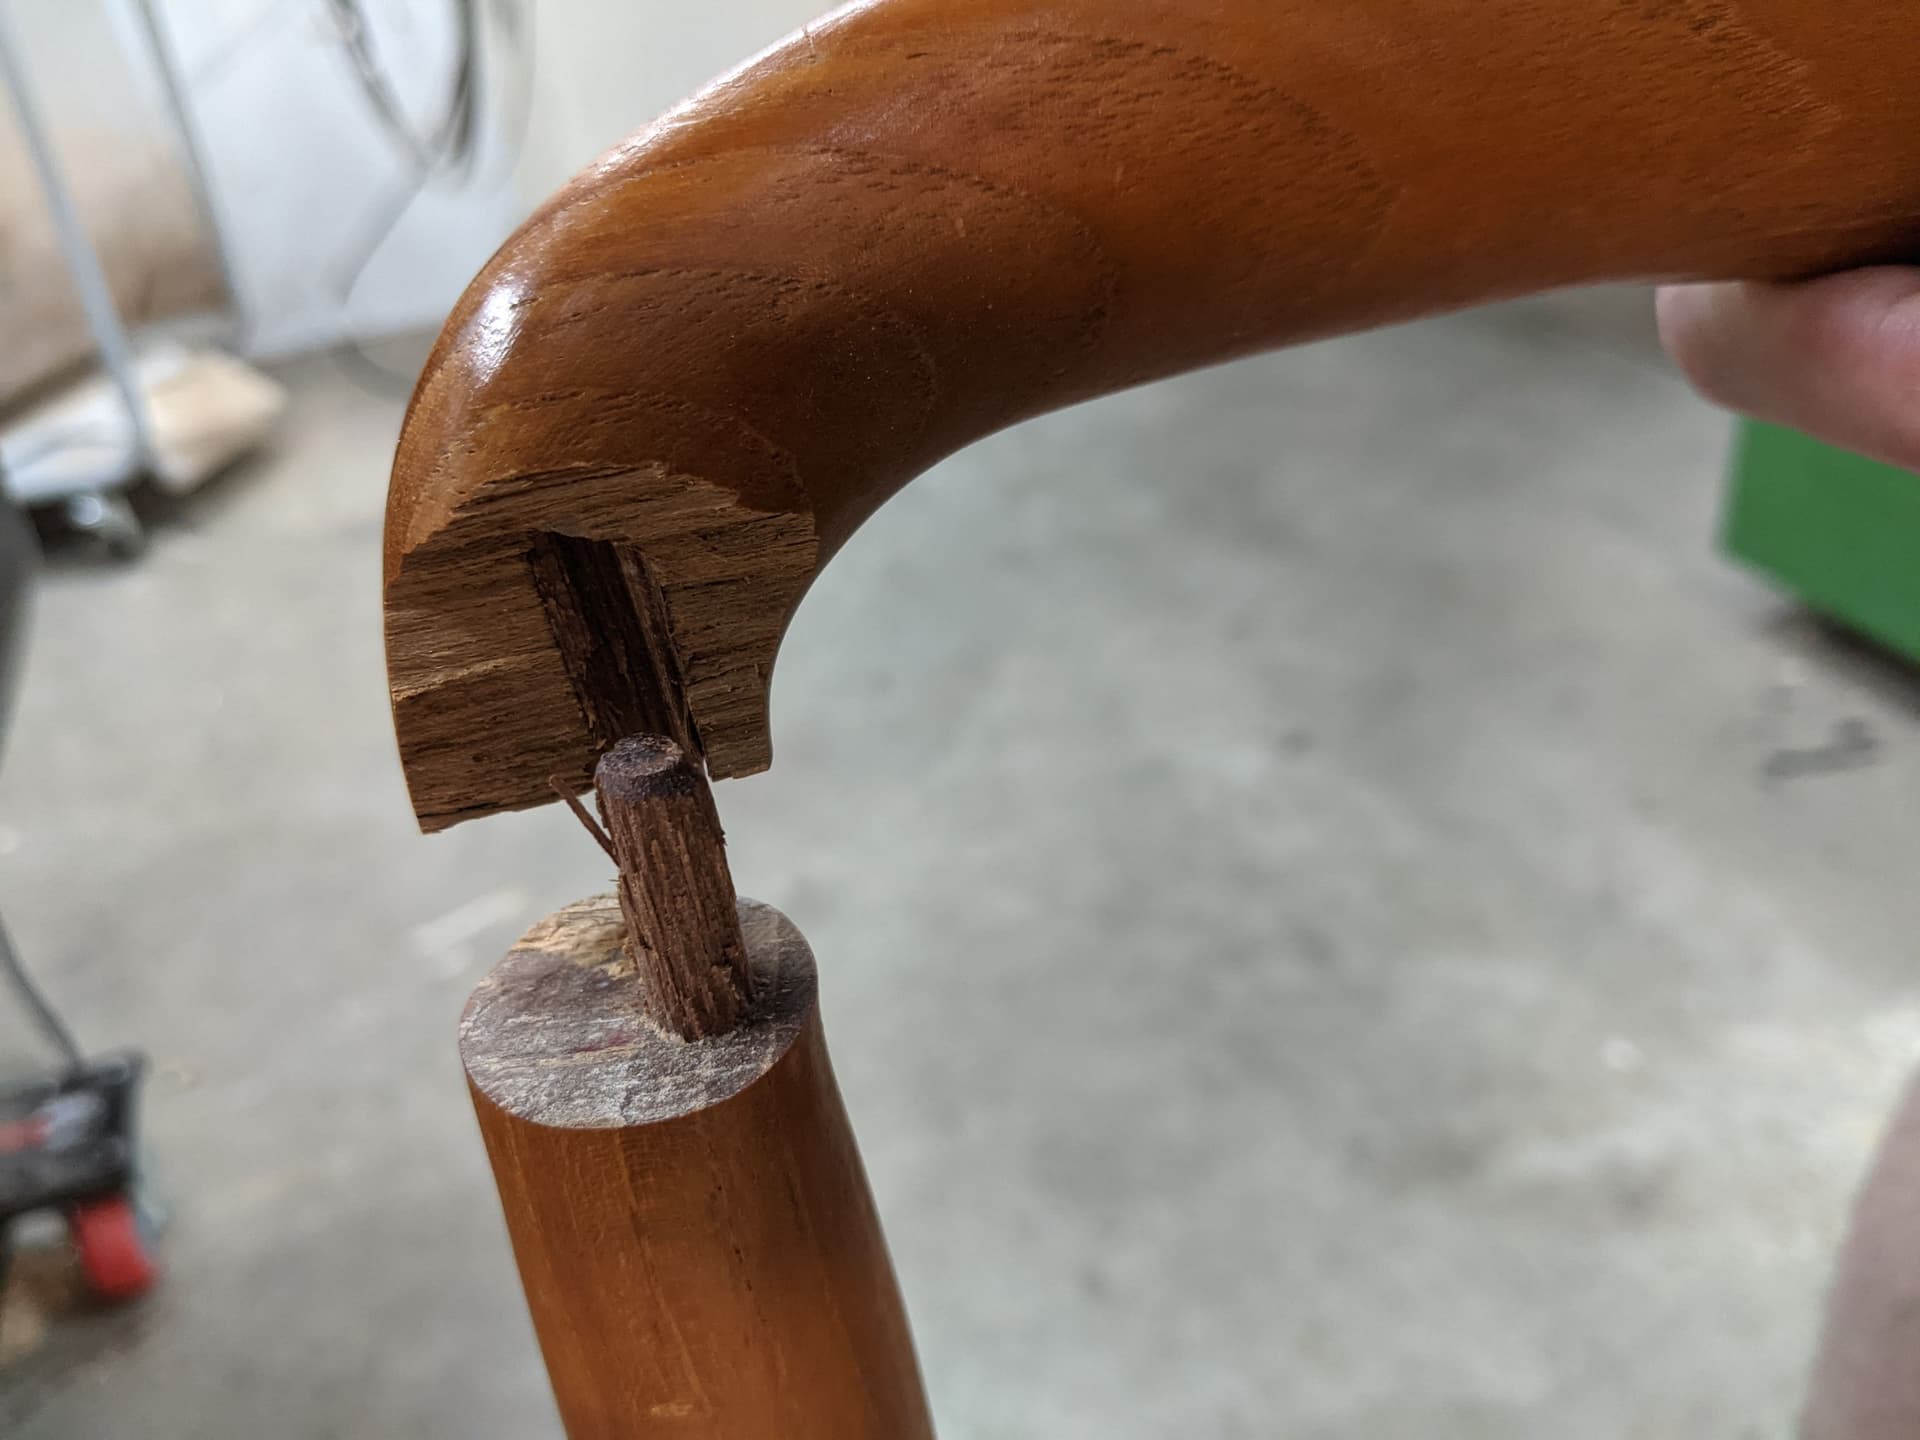
A friend of mine bought 4 vintage chairs, and one was heavily damaged in shipping. I’m going to try and fix it as best I can. Does anybody have great ideas on how to do that?
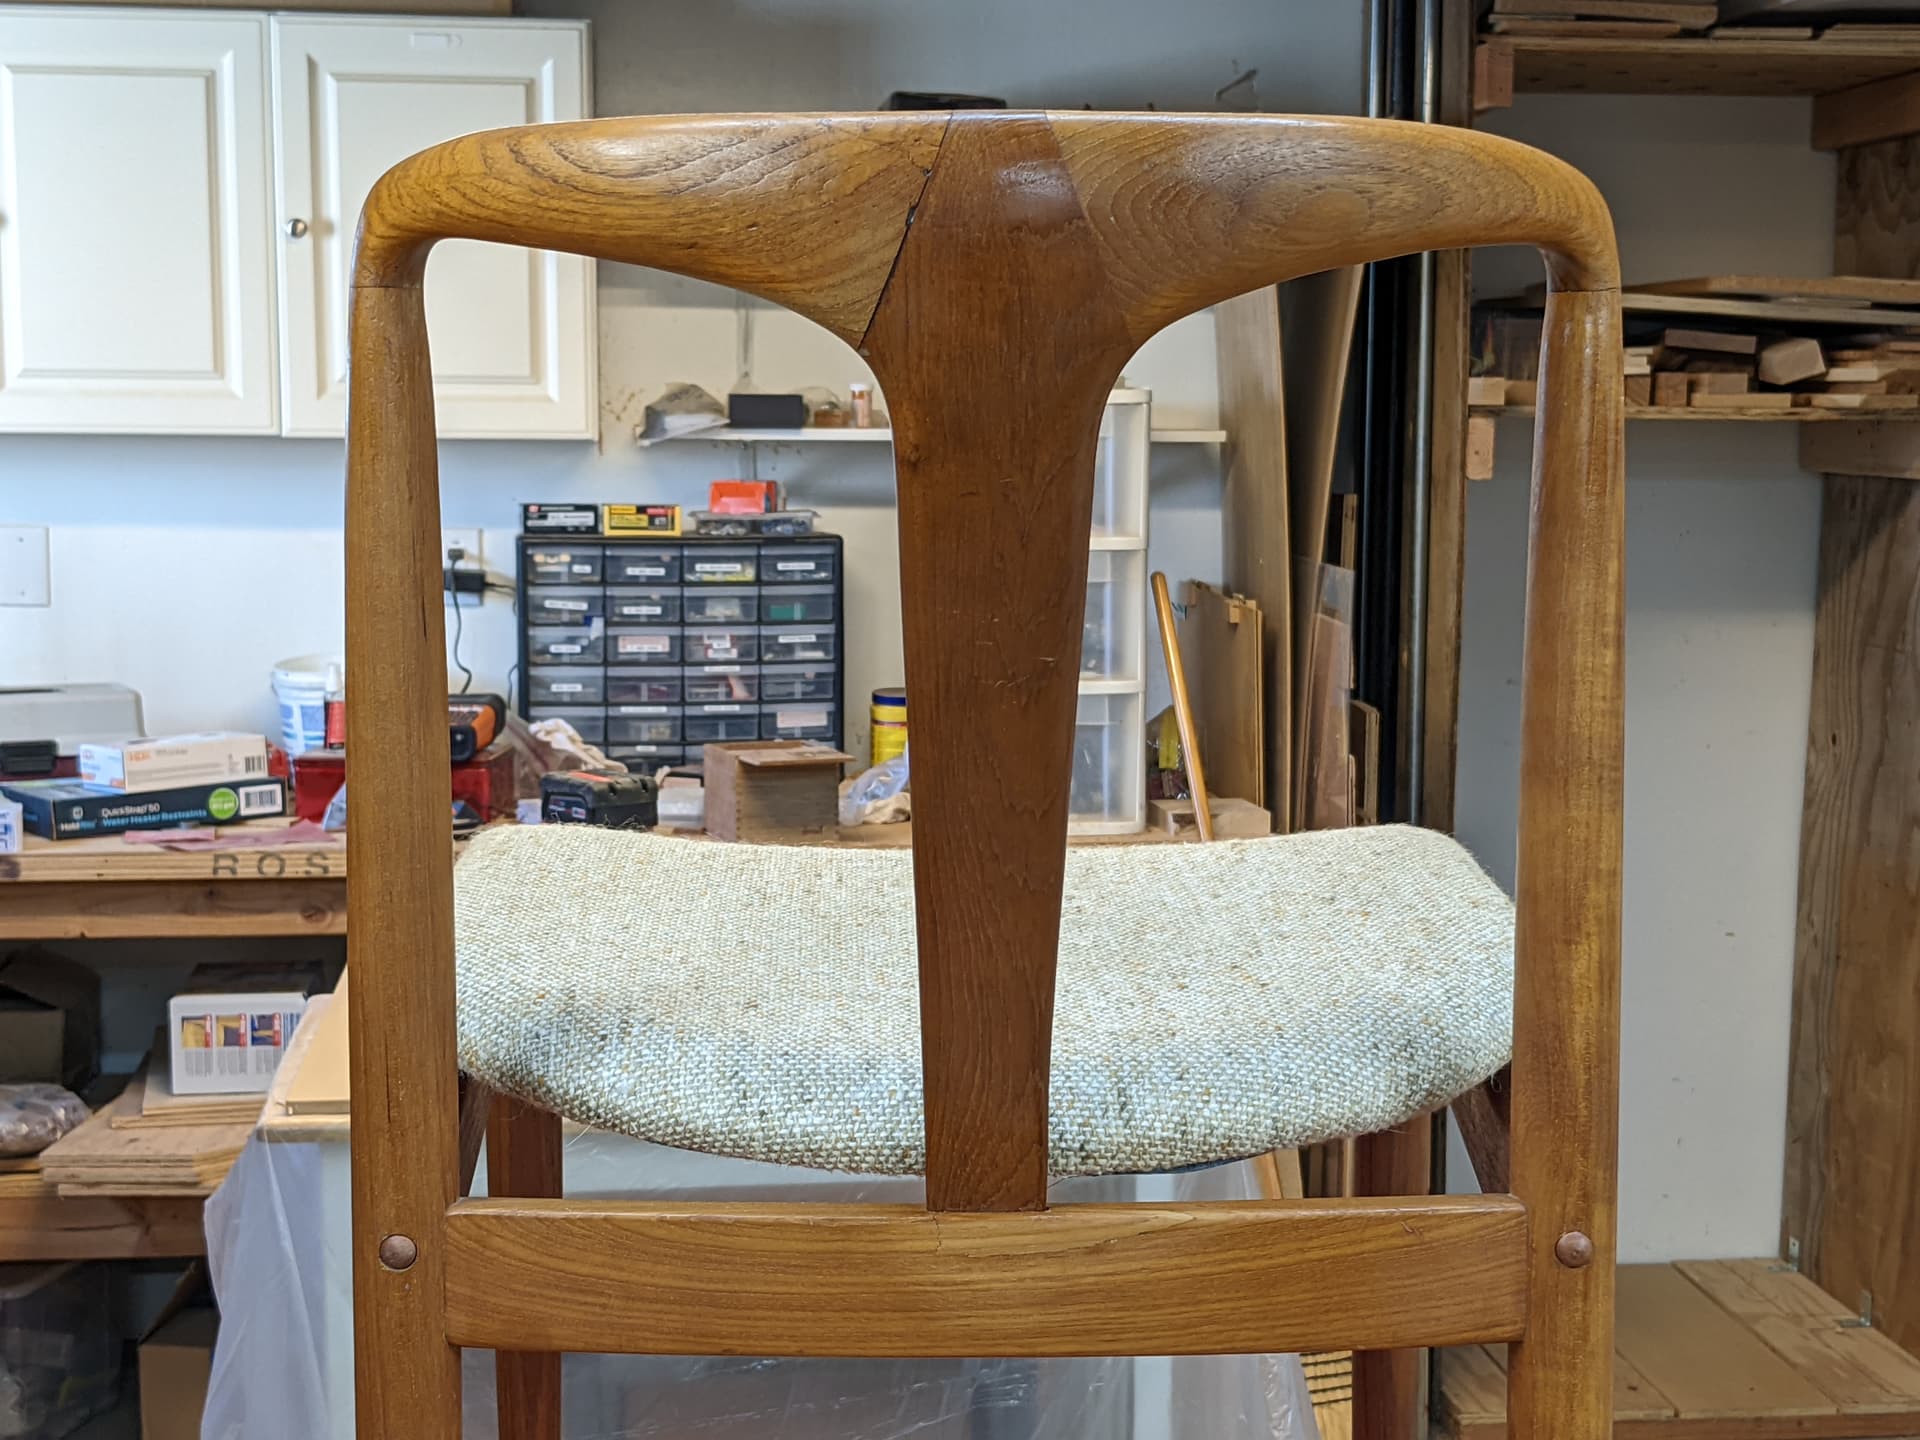
My plan is to glue it together with epoxy, and then fill any externally visible gaps with clear epoxy mixed with teak sawdust to hopefully get a reasonable color match. No idea what to do about a final finish, but I’ll cross that gap when I get there.
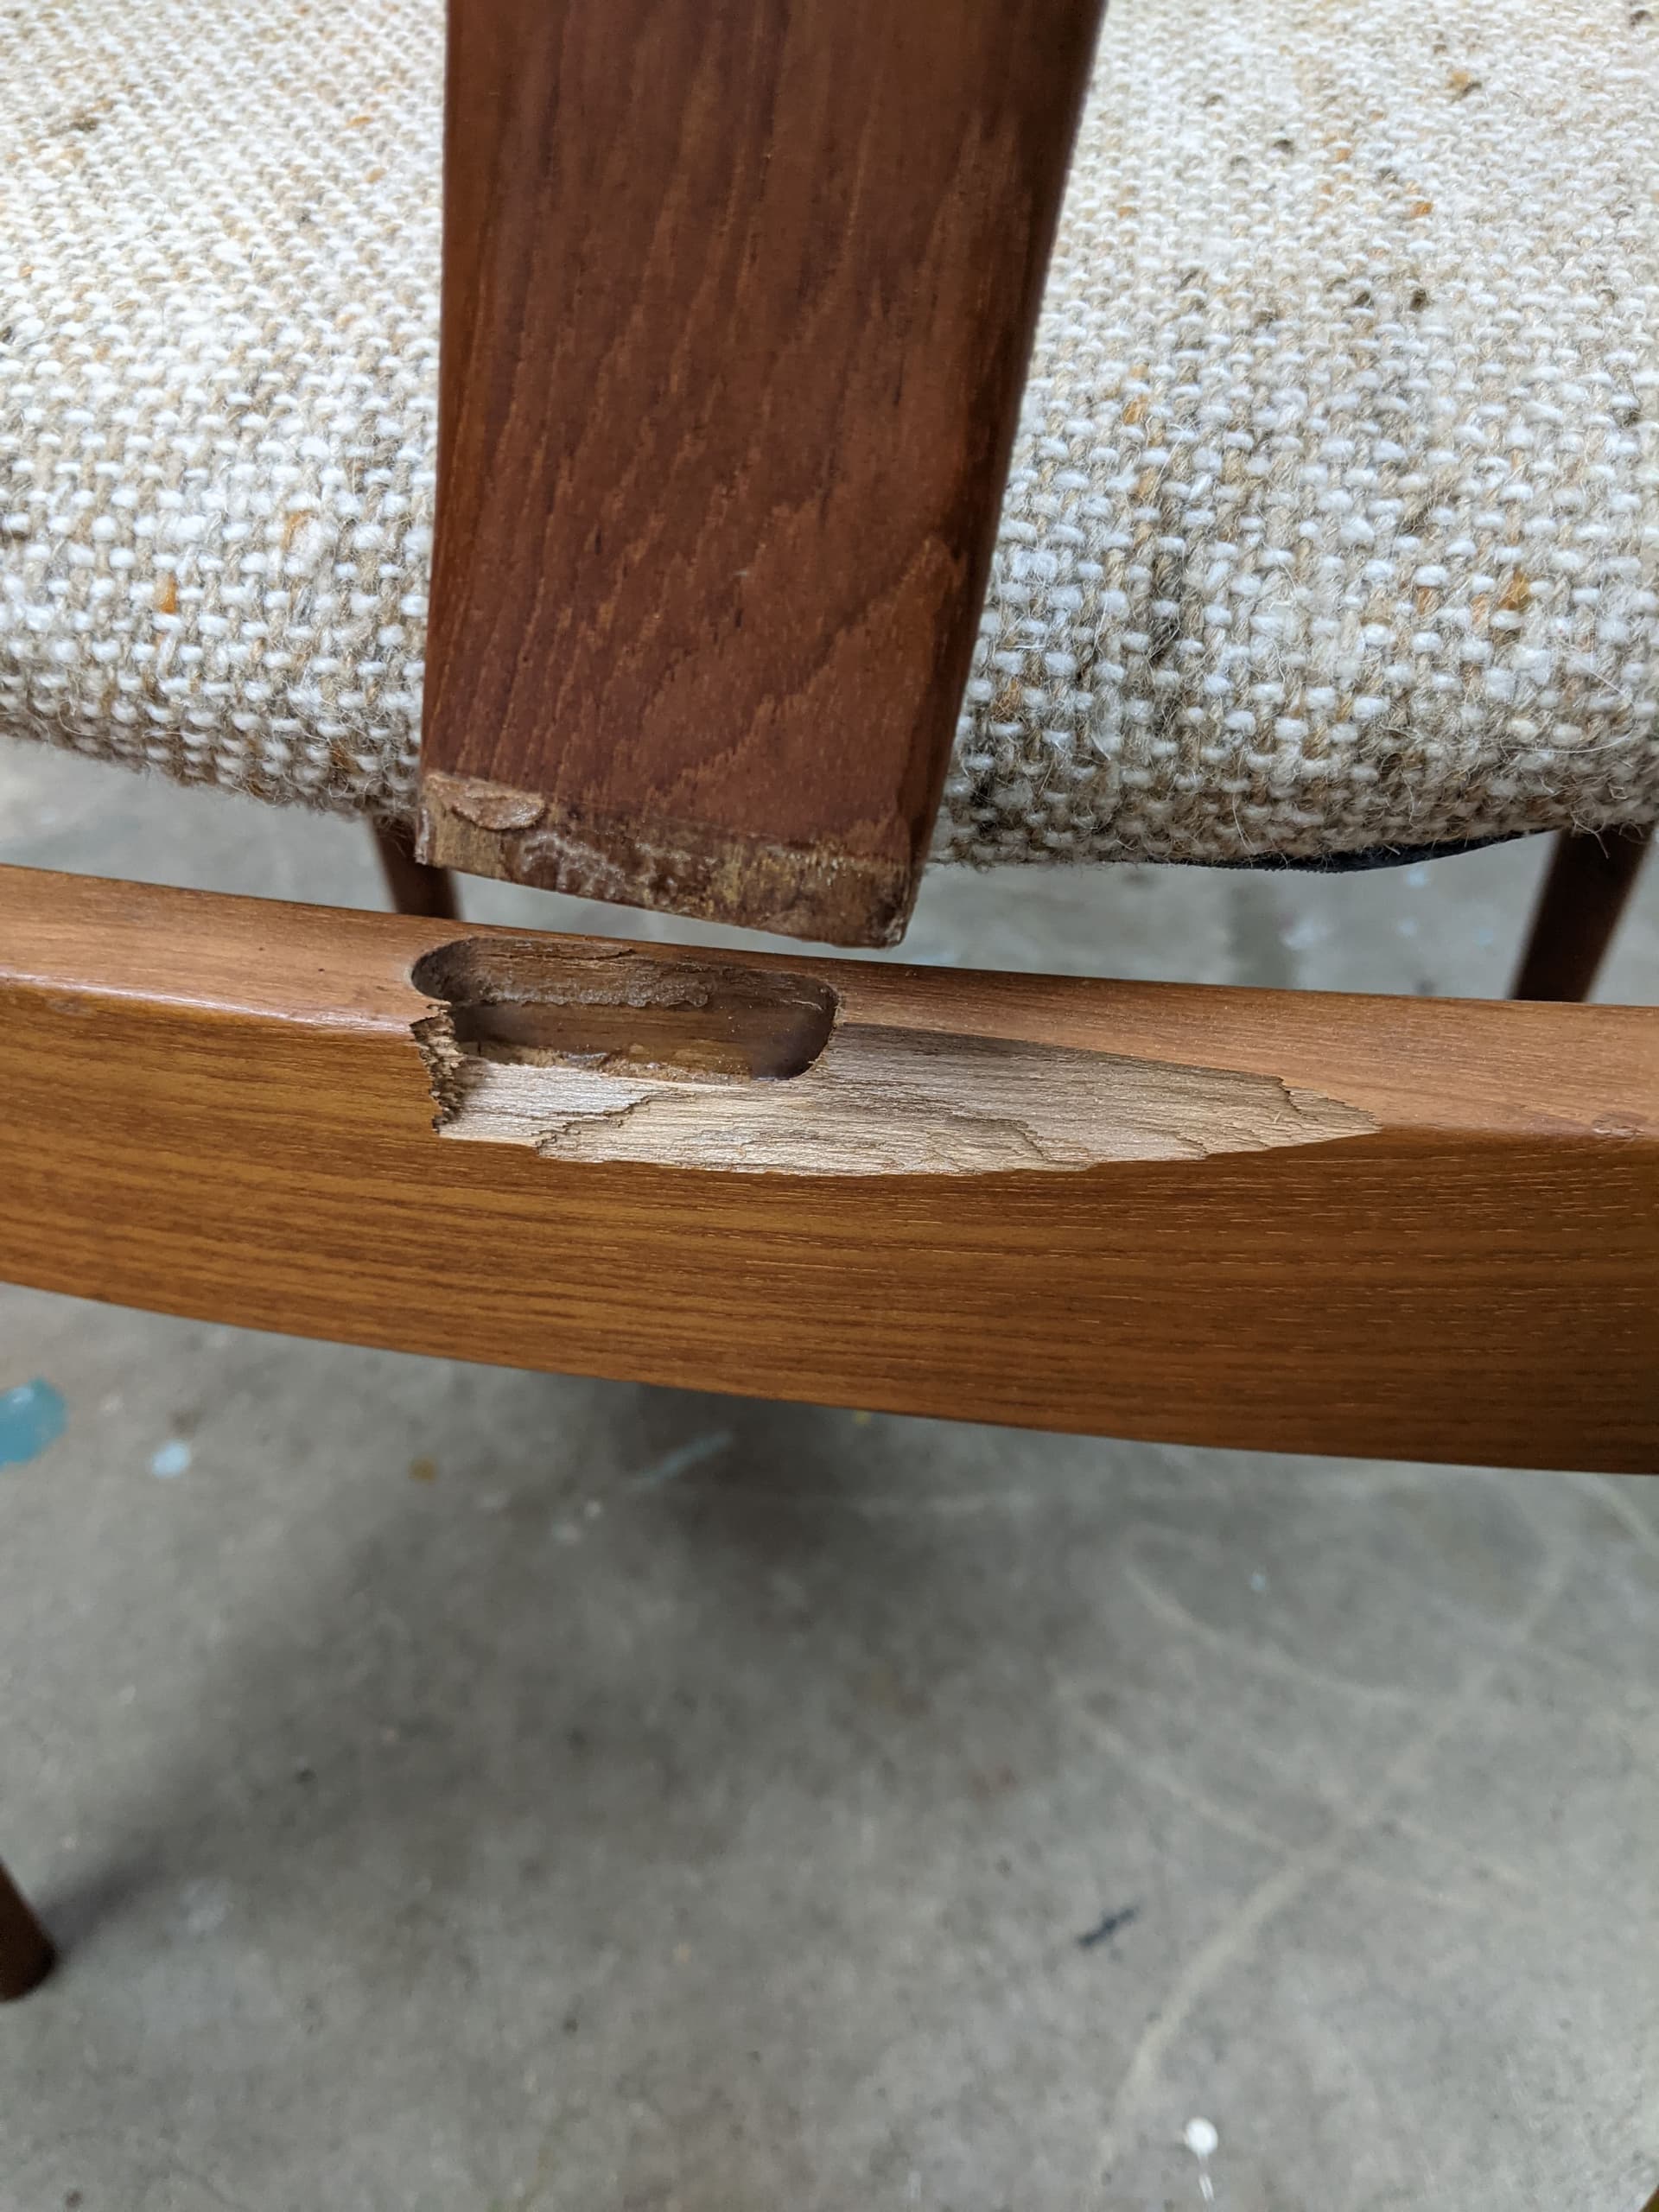
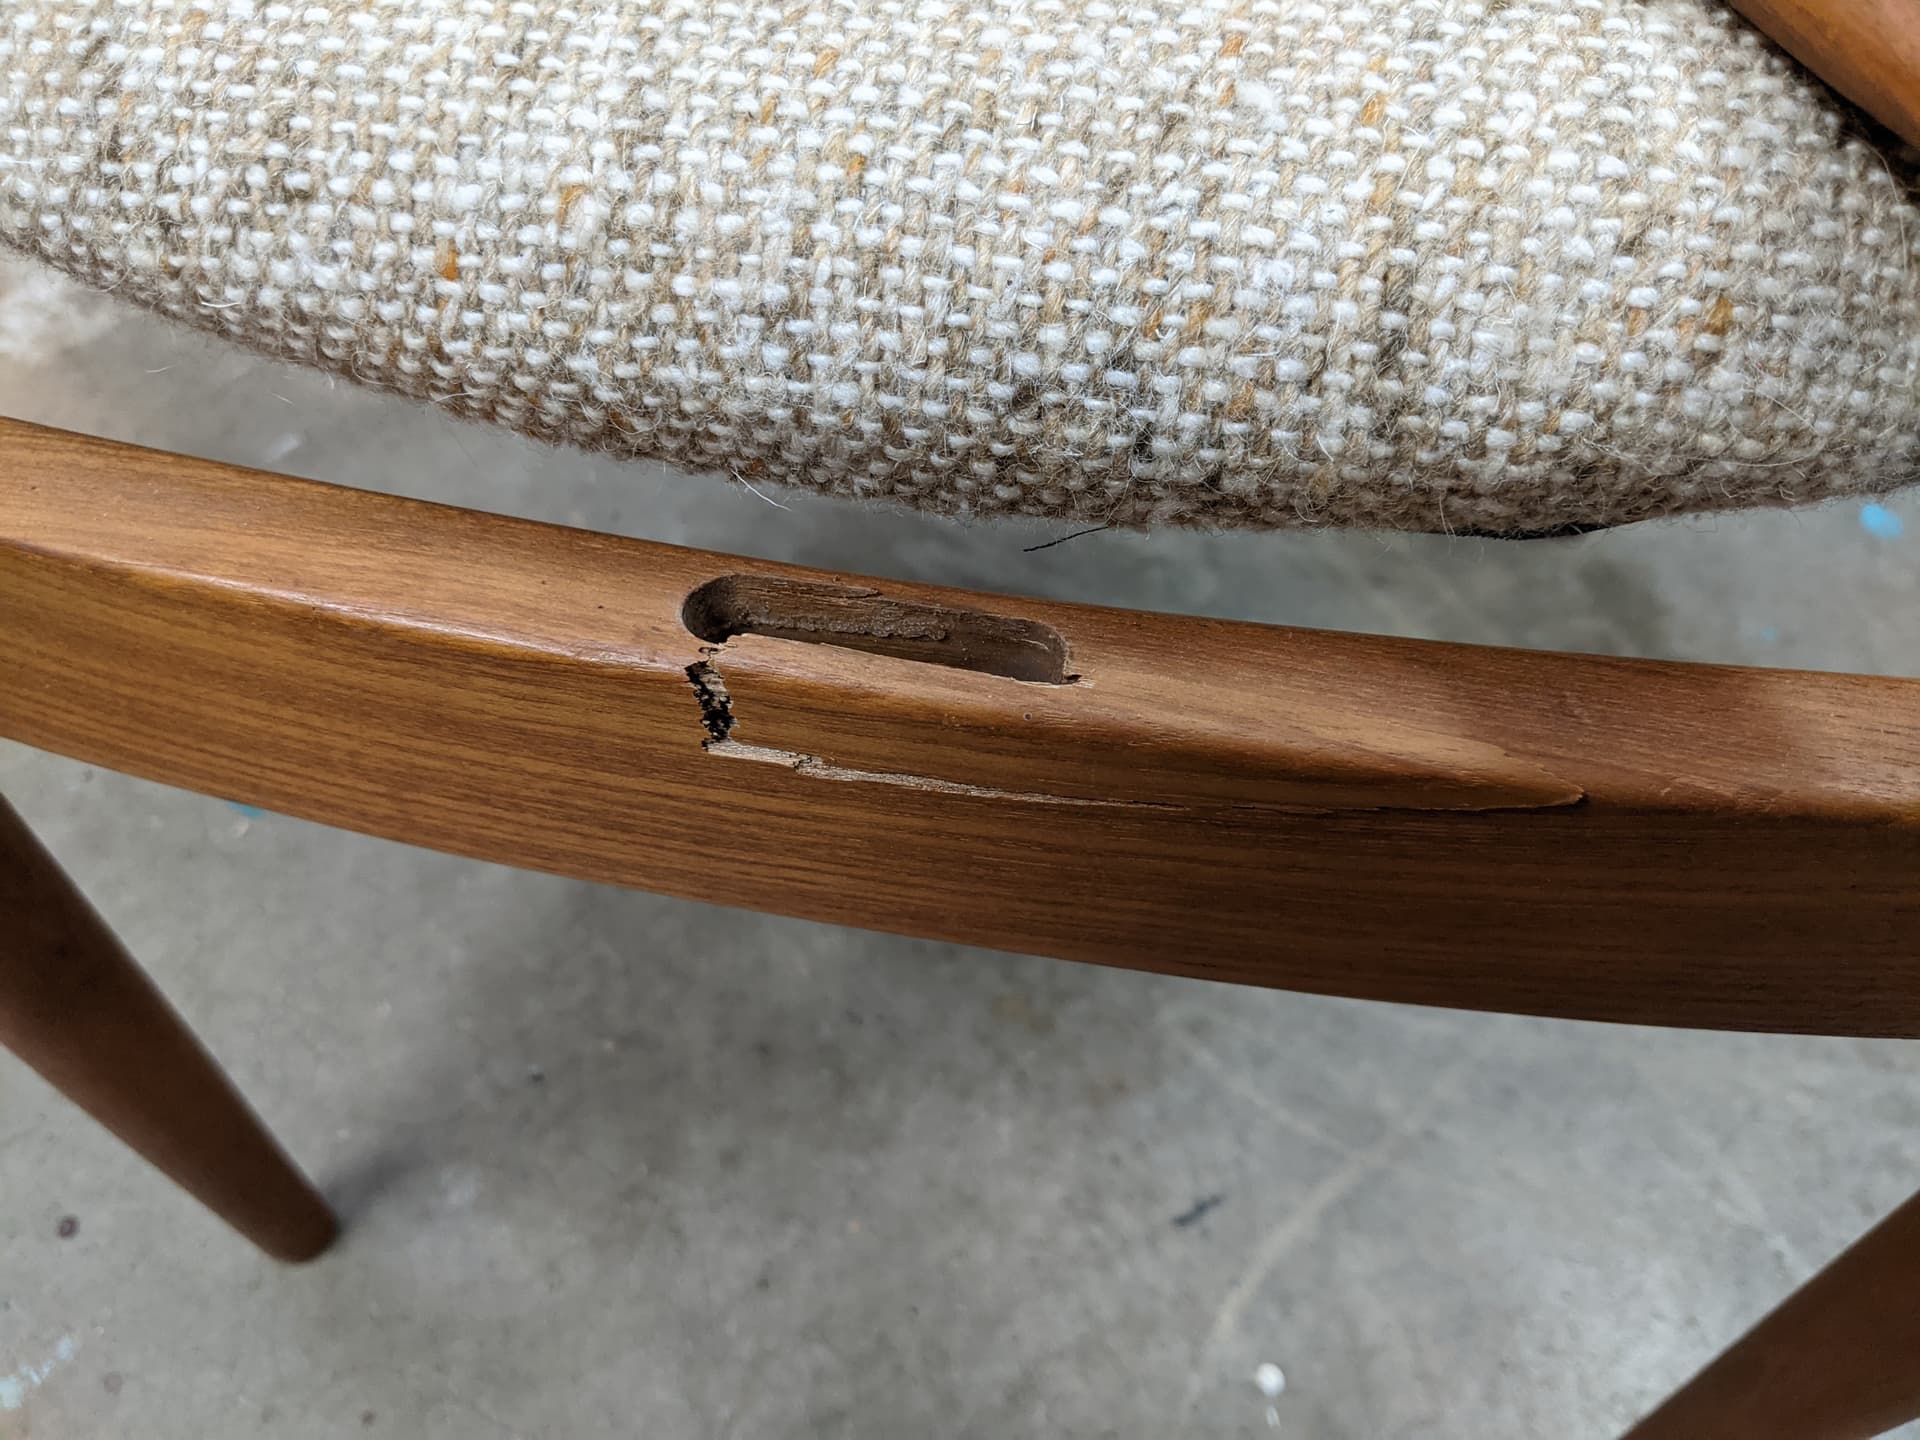
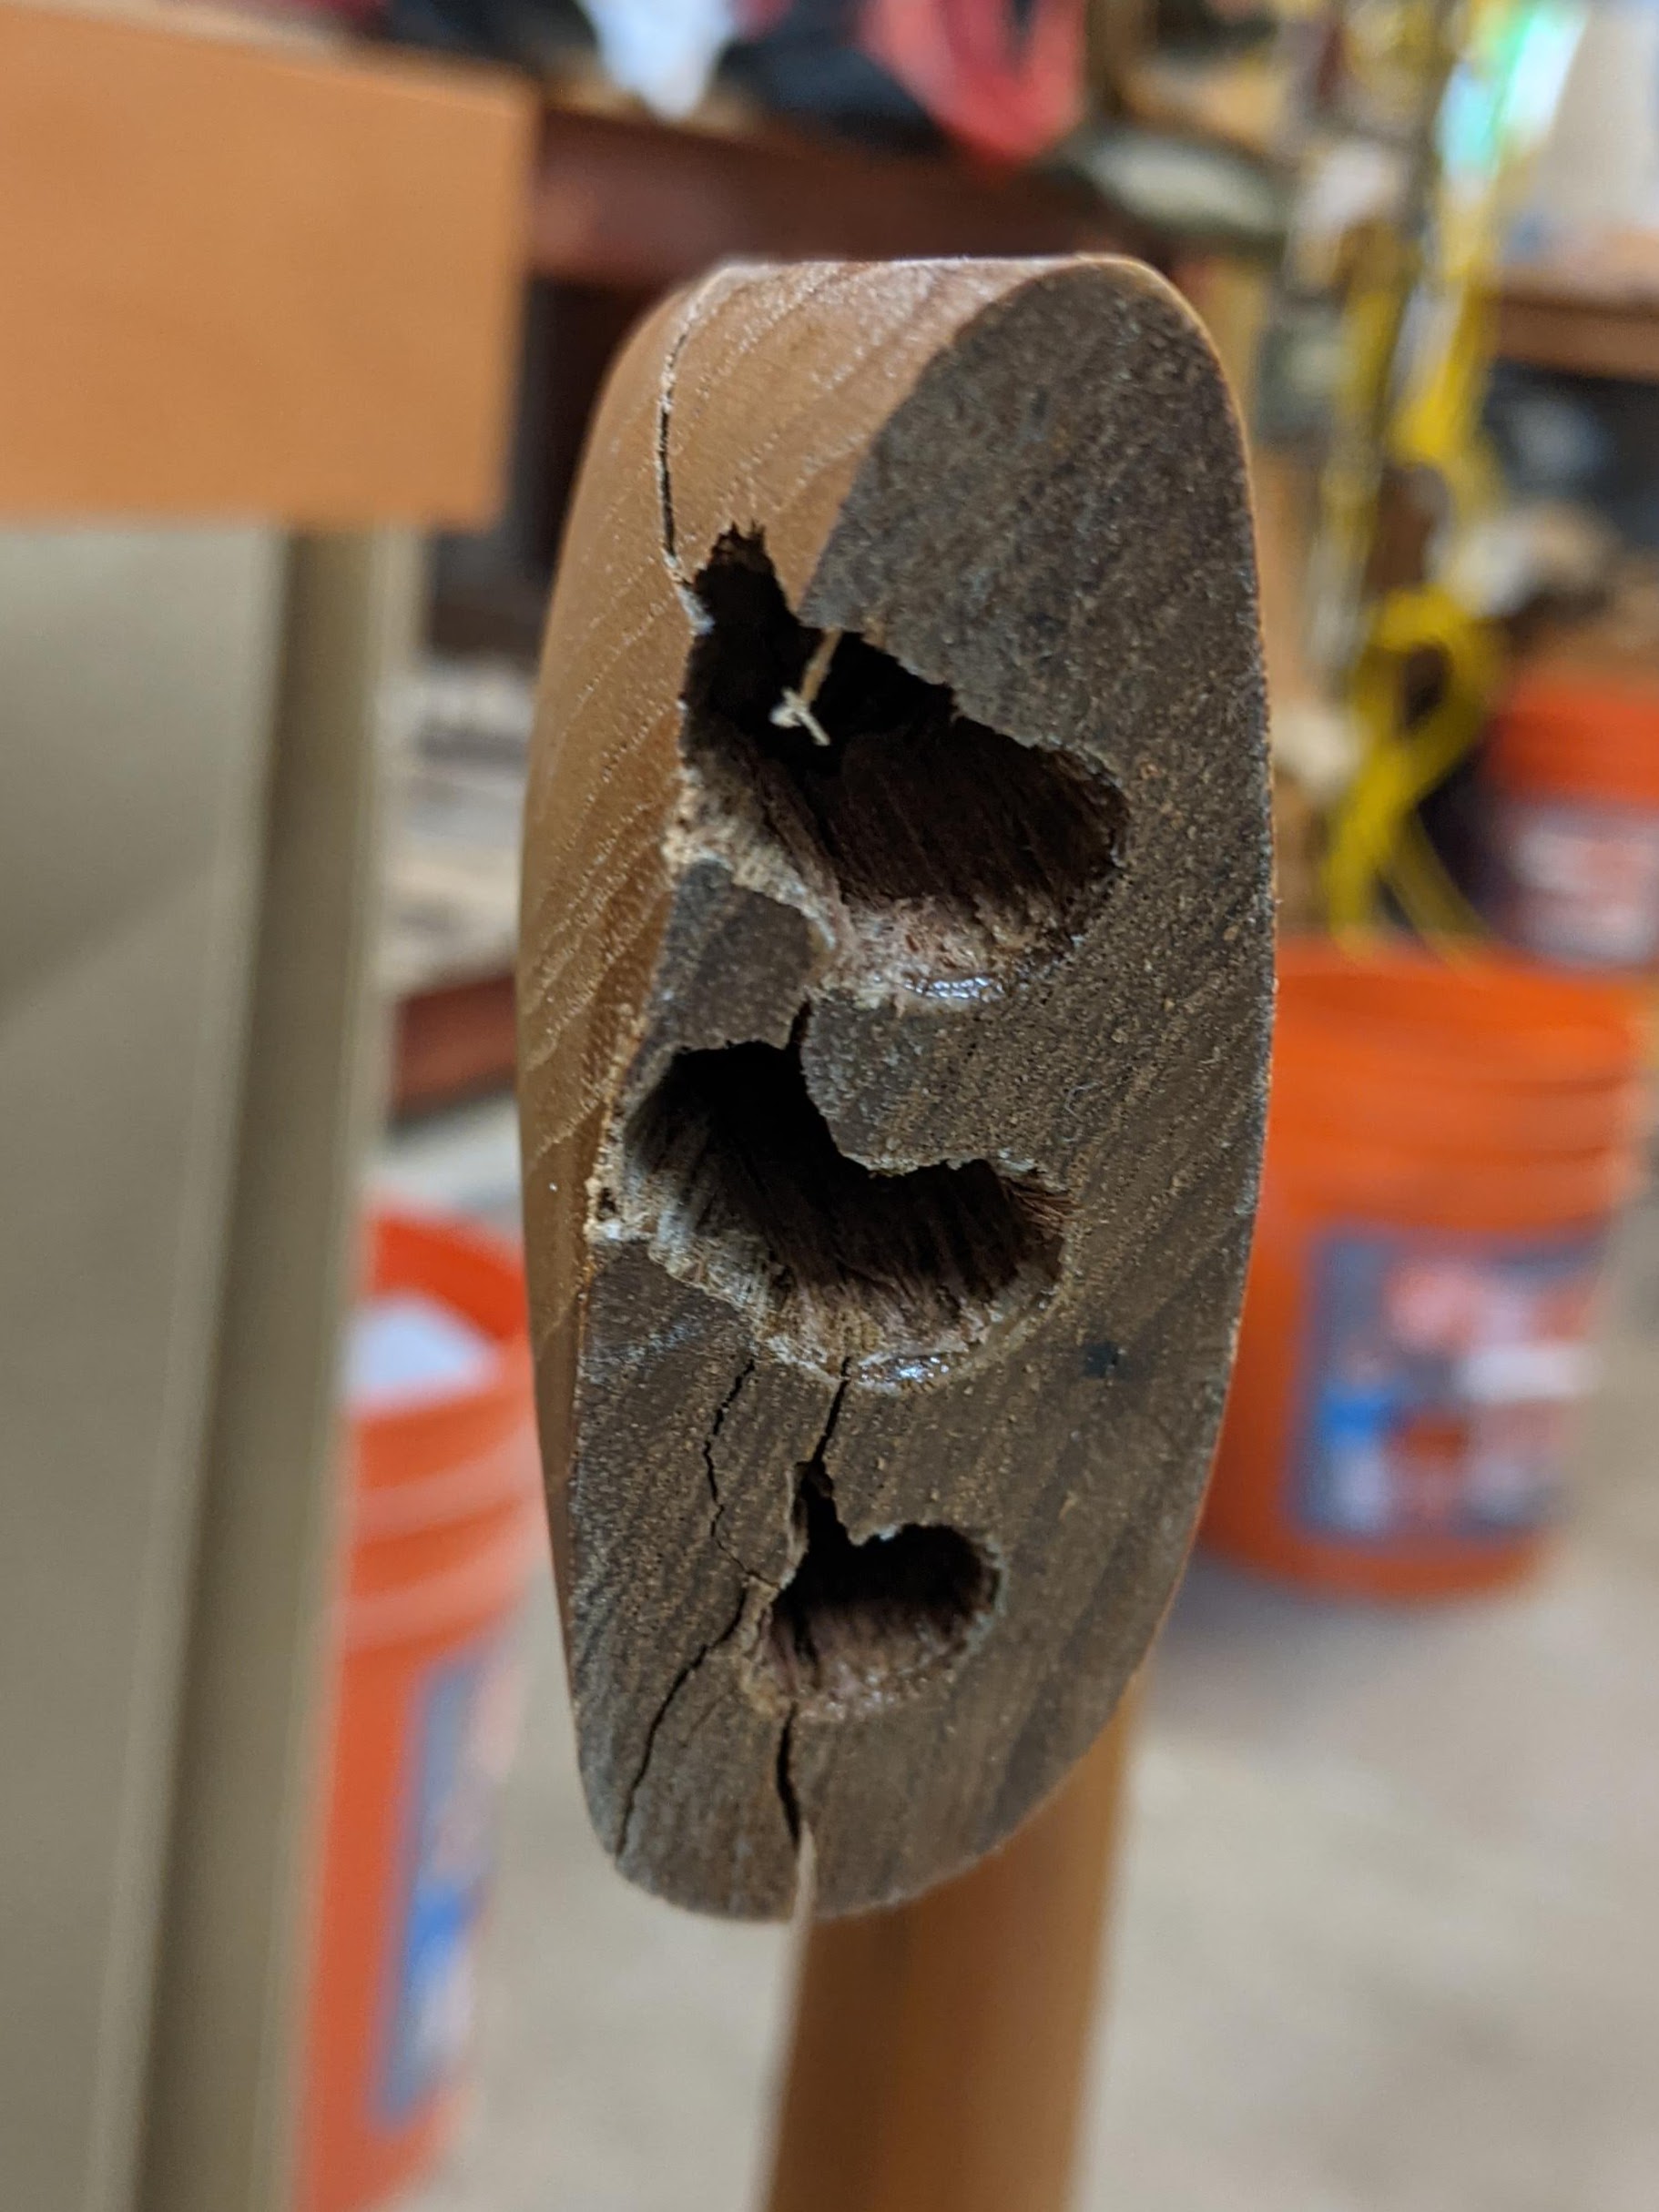
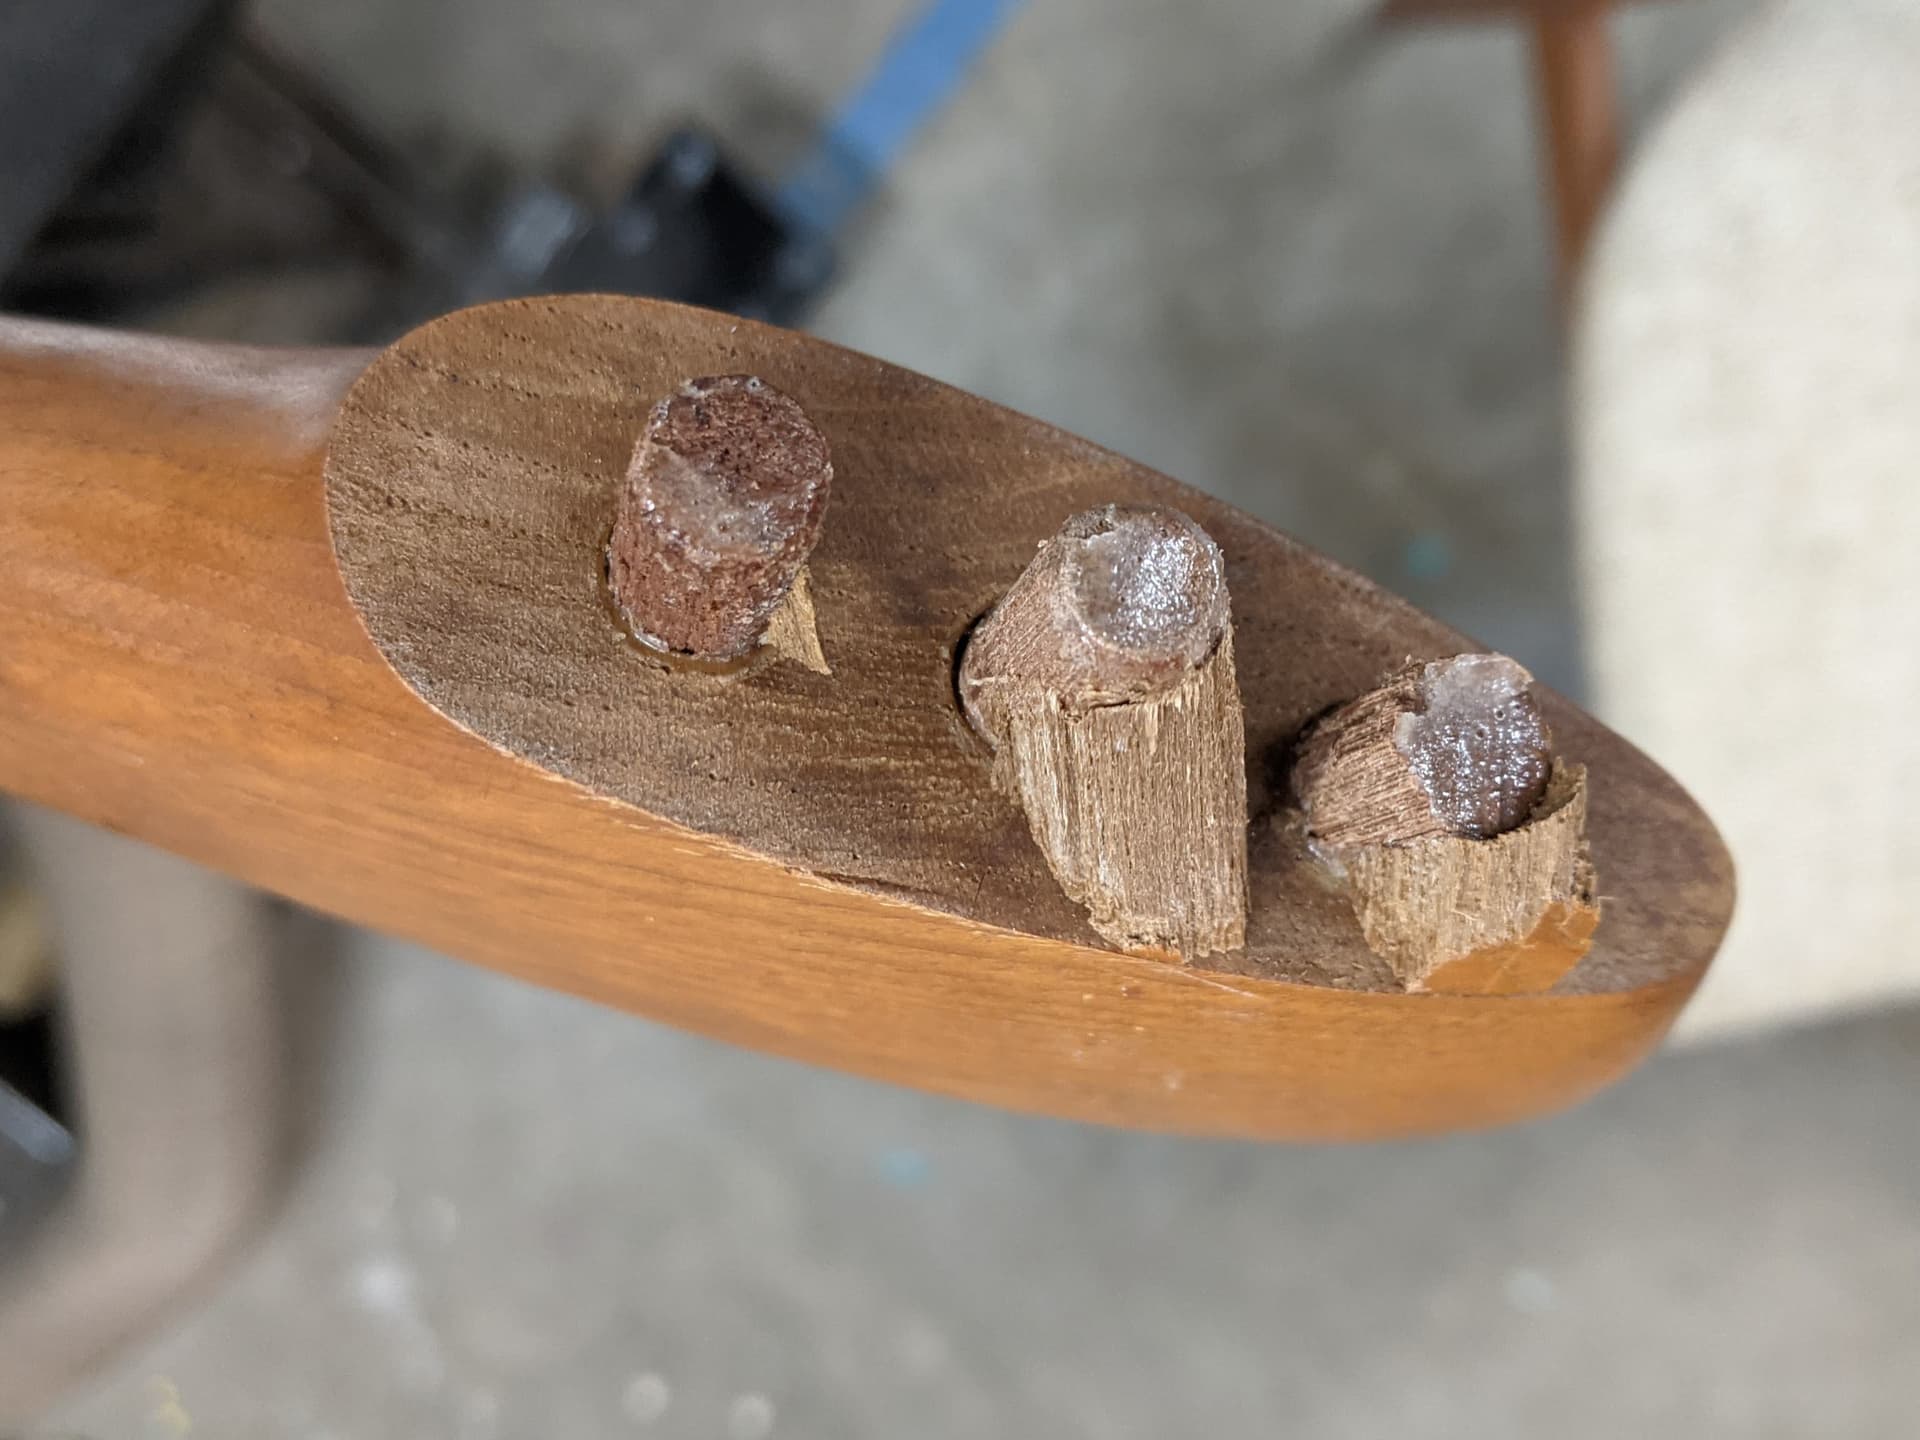
I have all the large splinters and a few tiny ones. Not sure how many tiny ones ended up missing.
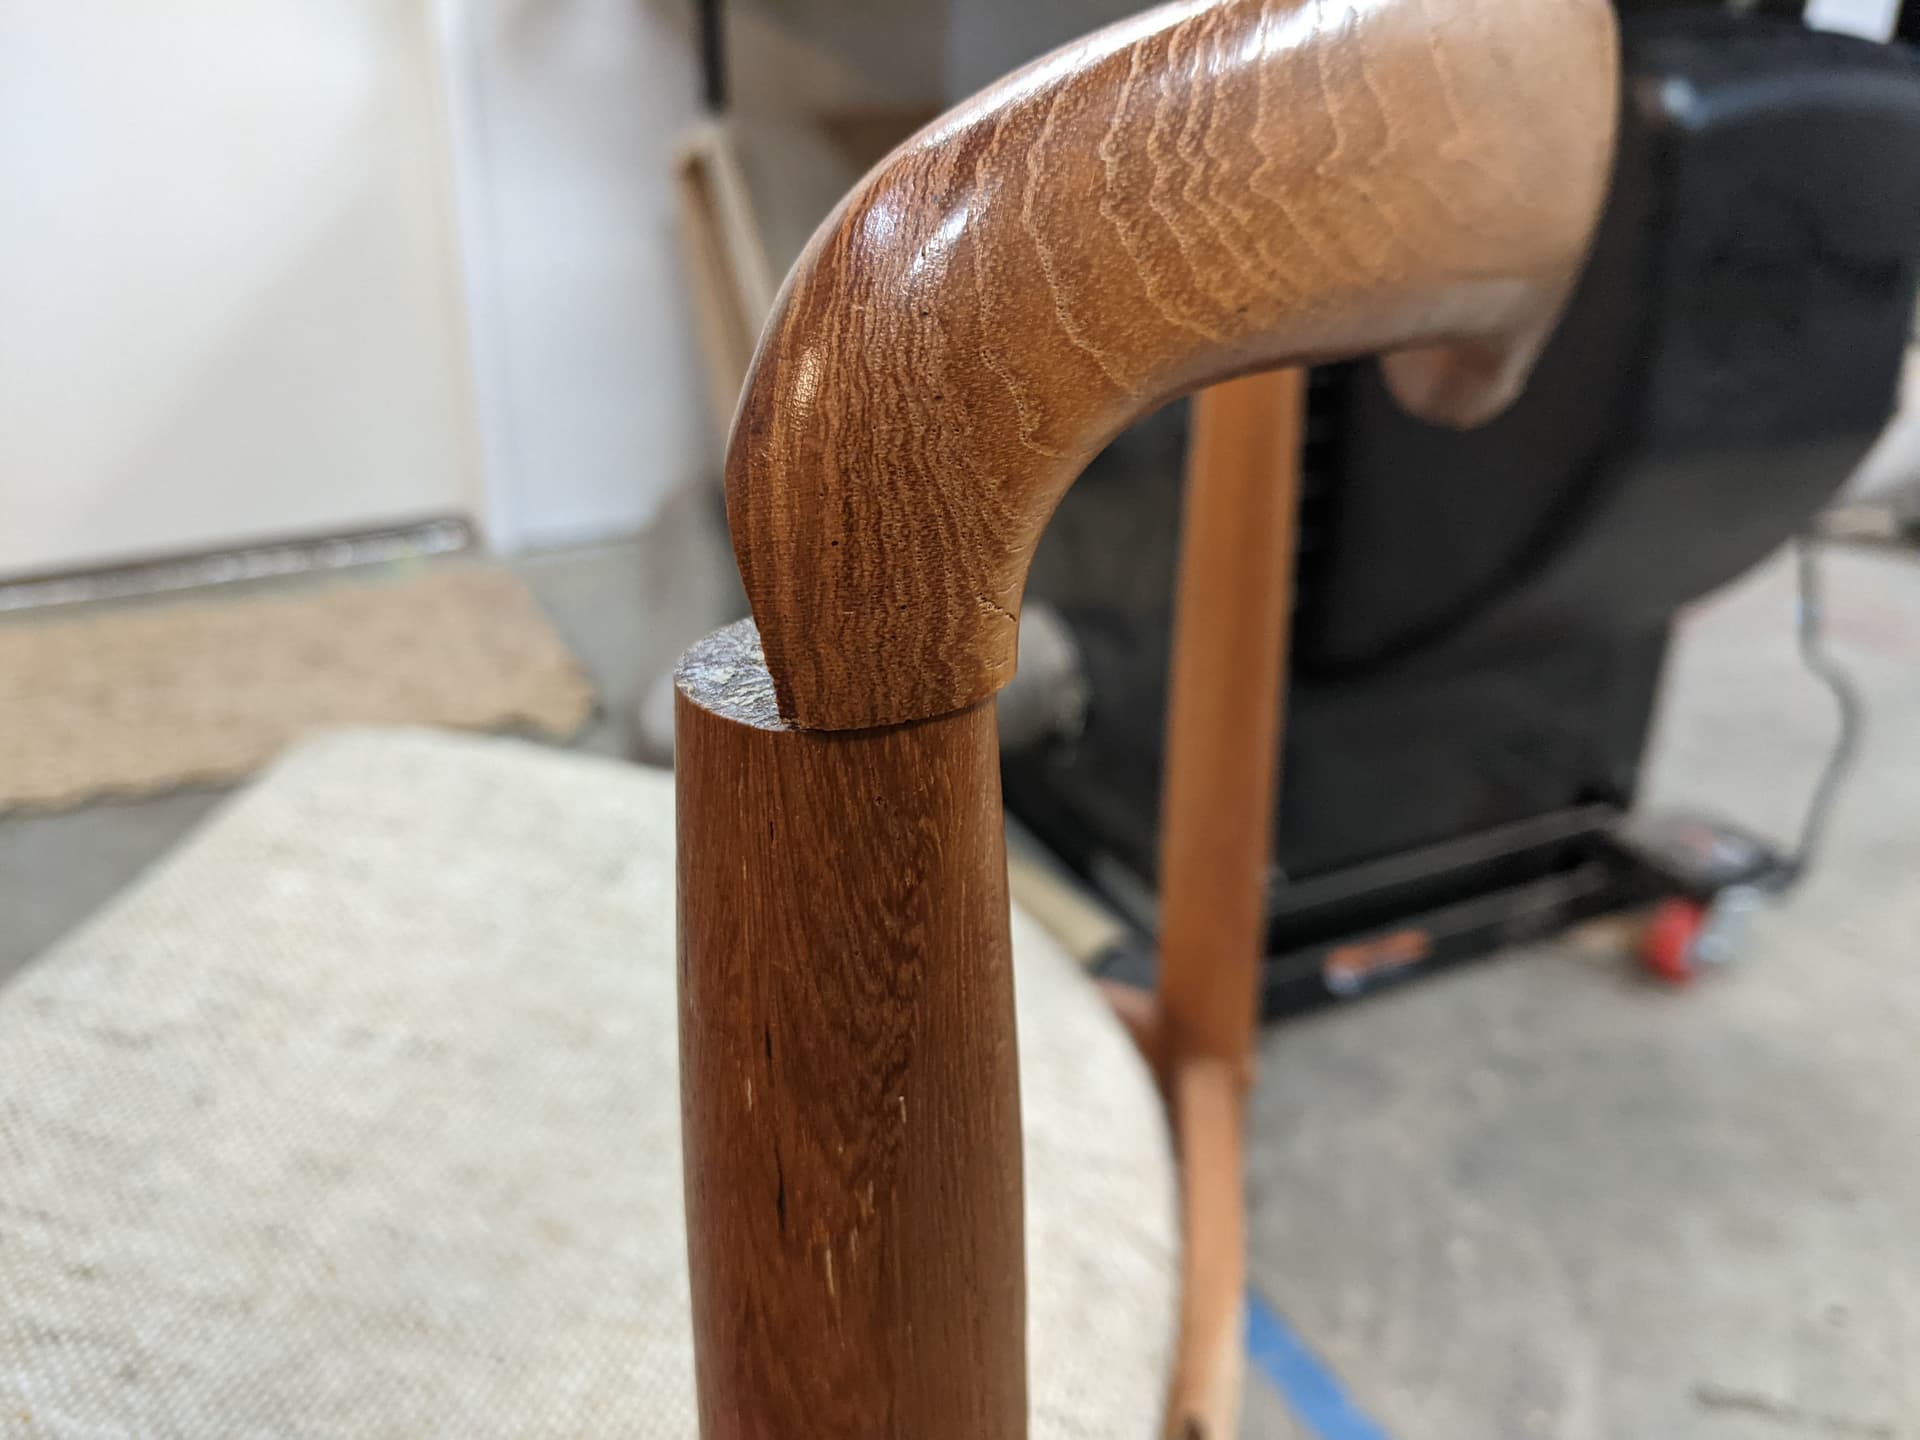
This one is still attached (except for the splinter), but needs to be rotated along the axis of the dowel for the surface of the cross piece and the leg to be flush. That feels a bit sketchy but I guess it’s OK? Or maybe that torque is one reason it didn’t survive transportation in the first place?
clean/remove all of the old glue w/ heat, solvents and gentle scraping…
it may be hide or fish glue (both?) w/ PVA mixed into the blend… I believe these chairs have seen multiple repairs w/ multiple different glues…
don’t use epoxy… it’ll get brittle after a while and the adhesion will fail over time… epoxy doesn’t really care for oily tropical woods and won’t hold up under duress (flexing) when the chairs are used…
for the missing splinter fills…
use matching grain filler in multiple applications, TimberMate filler, Mohawk Blend It or their repair sticks… filler won’t fix large or deep areas… but it’s great for the small stuff…
you want adhesive and not glue for the joinery…
I like WeldBond… Weldbond Specifications & Instructions.pdf (82.1 KB)
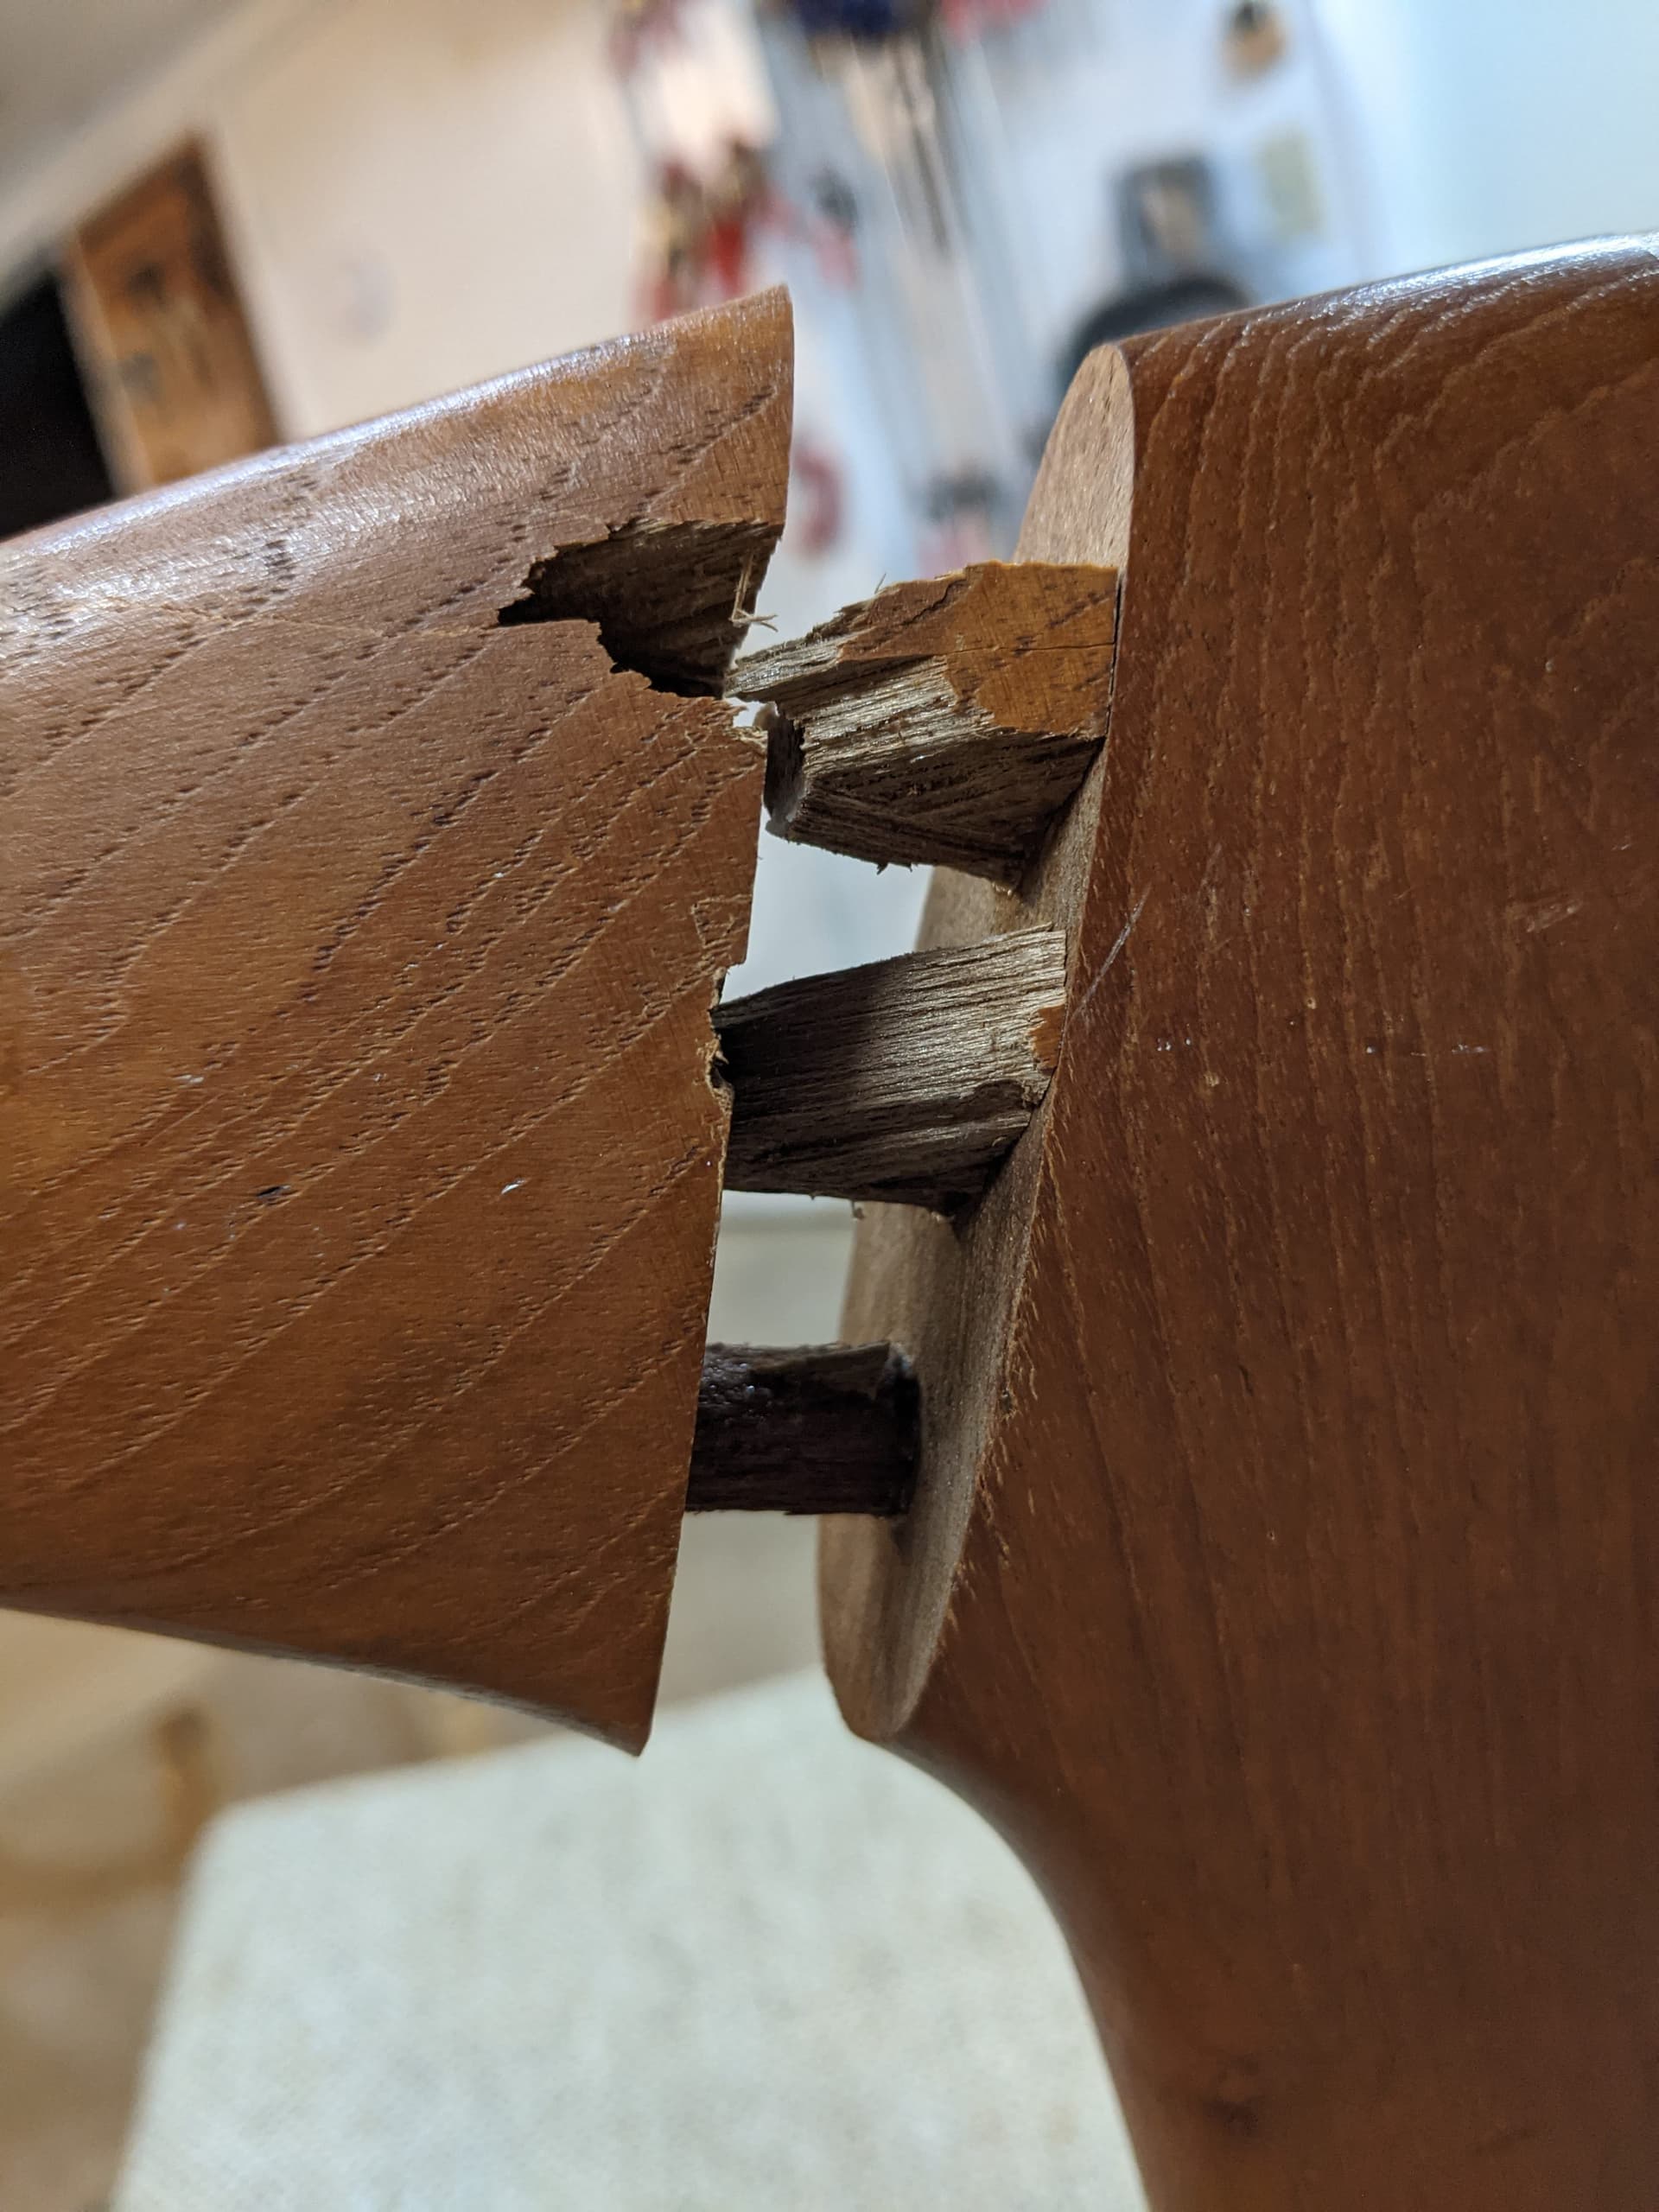
Do you have a bandsaw? I would put it all back together then use it as a pattern and make a new back piece. No matter what you do trying to make the puzzle presentable it is going to look like a patch job. Being broken crosswise in the middle doesn’t patch together very well either structurally.
Either get a piece thick enough or glue up a block thick enough. If you can’t get teak, maybe Alder could be made to match. Check with Crosscut Hardwoods to see if they have a 3X6 piece a couple of feet long.
As far as the rest of the splinters in other areas, you may be able to glue them back together, and in the old days they used resinsticks of different colors to patch voids. You melt the resin with a woodburnings iron or small soldering iron into the voids and use a putty knife to shape to the surrounding area. The new ones might not require heat.
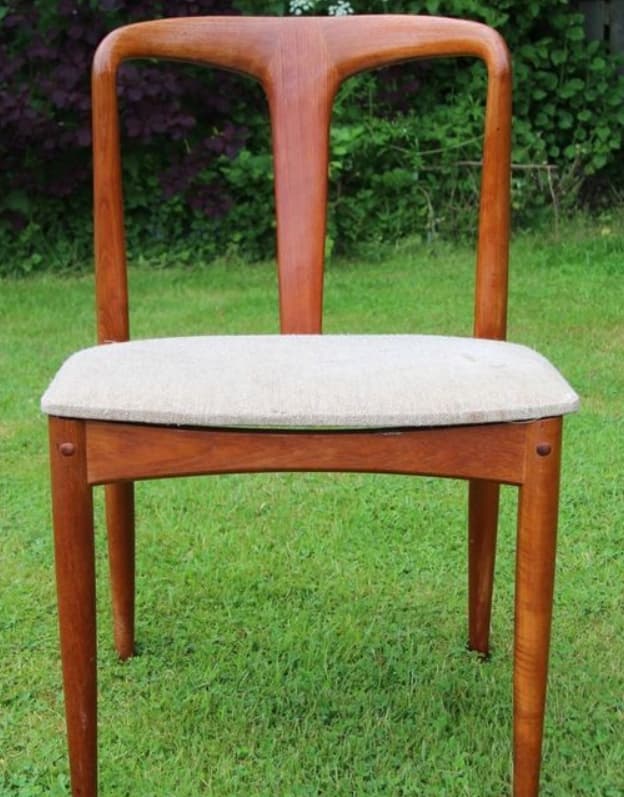
Does it look something like this? I didn’t realize it had a center post on the back,I thought the top rail was one piece. You still might have to make a new top rail.
Herb
Thanks @Stick486 and @HerbStoops. You’ve given me much to research and think about. Sounds like epoxy isn’t great for strength so I’ll go with something else. Especially the tips about trying to remove the oils in the wood before gluing seem very important.
I will try to put the chair back using the pieces that I have. If it looks terrible than I can consider remaking the back, as Herb suggests. Hopefully it won’t come to that because it looks like teak is hard to find. I suppose I can learn about color matching…
BTW, Herb, that picture looks like the exact chair. I didn’t make it clear in my pictures that it has a center vertical piece as well.
Deep scratches are quite difficult to conceal. To fix it, you’ll need a wax filer stick in a matching color with your floors. Rub the wax filler stick into the scratch until it is filled, then buff the excess using a clean, soft cloth.
The process of fixing dents on is quite different from that of repairing scratches. Usually a combination of heat and moisture is used to restore the dented area to its original state.
First of all, inspect the wood to ensure that it’s not broken. Cover the dent with a damp towel on the area and go over it with a hot iron. Repeat several times until the wood is raised…
To fix gauges begin by sanding the area using a fine-grit sandpaper. Sand gently along the grain until the wood is smooth. Clean the dust by vacuuming and fill the gauge with a wood filler. Do not use a wood putty as it may not accept the color of the stain…
Wood filler comes in variety of colors and it is easier to match the color of your wood. Once your filler has dried, gently sand it to until it is flat and smooth. Refinish the area to match…
Gauges are deep openings into the wood which cannot be concealed…
After much indecision, I’ve started gluing some of the joints using G/Flex 650 epoxy. Unlike most epoxy it’s a little flexible, and it also explicitly says it works with teak. I found a few posts online from people who say they’ve used it for teak furniture. The joints look so-so. It’s pretty obvious that they’ve been repaired, but it does all feel sturdy. I have a bit more gluing left to do, and also smoothing over the epoxy where I’ve used it.
I’m out of town this week. Going to visit the Stickley Museum in NY tomorrow.
Back when I was doing boat work, laminated railing and the like. If the product was teak, I used Resorcinol. It will ignore the oil in teak and is very heat and uv resistant. Don’t know how it will do cosmetically, but for joints it is much superior to the newer epoxies.
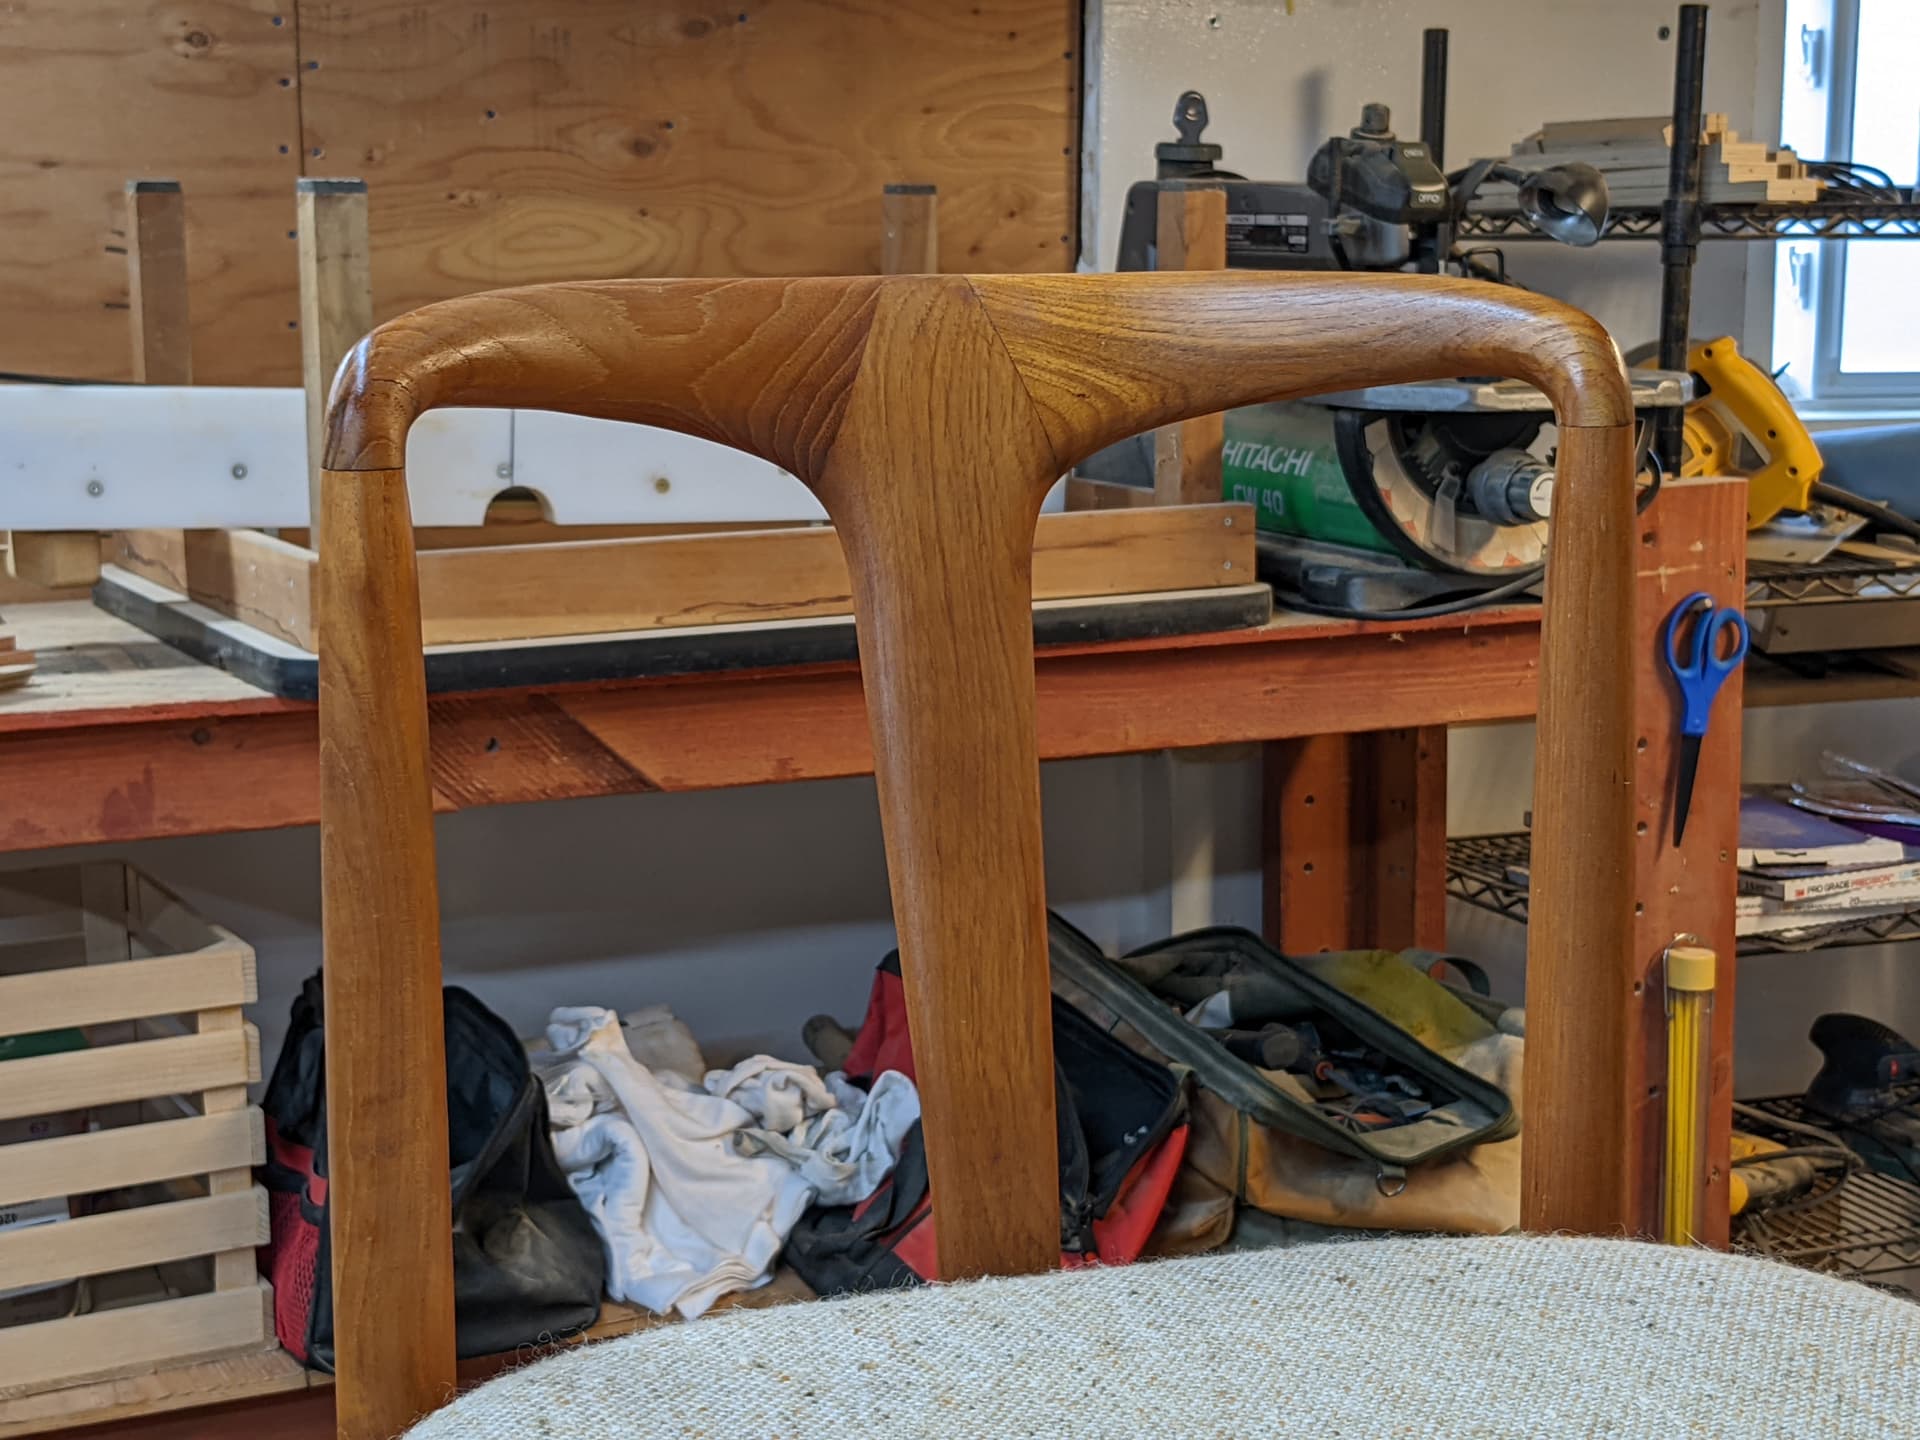
So I’ve done as much on this as I’m going to. I used G/flex 650 epoxy, and finished it with spray lacquer. The finish doesn’t quite match (it’s a little shinier), and where I had to sand the chair down it’s a little bit lighter than the rest. I assume that as time goes by that will even out a bit.
Overall, I’m quite happy with the repair. It’s far from seamless, but it’s an entirely reasonable looking chair now, and if you’re just using the chairs and not really looking at them you might not even notice.

 ). If I work with teak again, I’ll keep this thread in mind.