Helpful How To's

Getting it straight…
you want absolutely straight and paralleled edges on your material???..
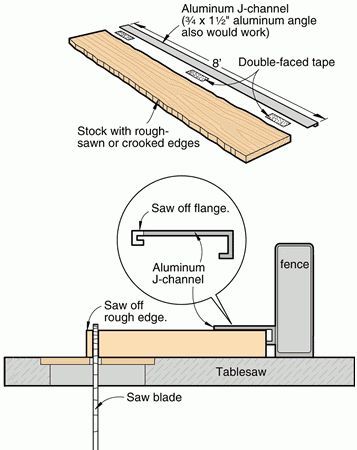
here’s a method that is simple and works well…
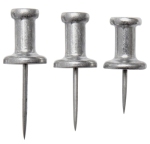
if you rather not use DS tape use push pins to hold the channel in place…
there are many shapes of metal to choose form… lengths w/ more returns (bends) lend to be straighter and stronger as in J’s vs right angle (RTA)…
after you straighten one edge, remove the channel, rotate the piece 180° and rip the 2nd edge…

JIG FOR STRAIGHT RIPPING

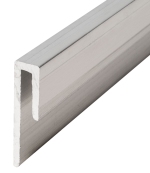
J CHANNEL
push pins

Note…
there is a slew of ready made J and RTA metal available in infinite dimensions and lengths up to 24’ long…

1 Like

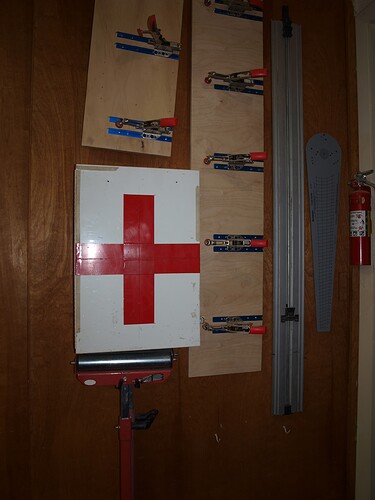
another way to straighten material are these…
they are also very good to do tapers w/…
the straight edge is for the router or circular saw…

1 Like

lack a joiner and you need to clean up or straighten boards???..
got large sheet goods you need to break down and you are by yourself???..
and a track saw just isn’t in the budget???..
this just may be to the rescue…

DIY TRACK SAW+JOINER.pdf (101.6 KB)
R4 JOINER SUBSTITUTE.pdf (36.4 KB)

Wood Inlay Tools & Techniques

Wood inlay can be done to add craftsmanship to wood. It’s common on musical instruments, gunstocks, small furniture items, jewelry boxes and crafts. Anyone can do wood inlay. It’s easier than it looks, requiring only hand tools and a bit of patience. Wood inlay is affordable, and you can get all the supplies at any hobby shop.

MOP Inlay Tools

Mother-of-pearl, or MOP, inlay often appears on the necks of musical instruments such as guitars, but it can added to any wood. MOP inlay can be purchased in dots with perfect dimensions, which makes it easy to work with because you only need two tools to do the inlay. The first tool needed is a Forstner drill bit. This special bit has circular, knife-like cutting edges that cut clean, precise holes. The bit size matches the dot size. For example, a 3/8-inch dot inlay requires a 3/8-inch Forstner bit. The other tool needed for dot inlay is a drill press. A drill press is needed for stability and to cut a perfect 90-degree holes. For sanding, a rotary tool with a sanding accessory is used.

MOP Inlay Technique

To do MOP inlay, install the Forstner bit into a drill press. Mark the location on the wood where you want the dot inlay. Place the wood under the bit and drill to a depth of approximately 1/16 inch. Place the dot inlay into the hole. It can be slightly above or below the surface of the wood, as long as it is within 1/32 inch of being flush with the wood. Remove the dot and place a small drop of household cement or cyanoacrylate glue in the hole. Place the dot in the hole and tap it until it bottoms out. Use a handheld rotary tool with a sanding accessory to sand the wood and the dot flush. Follow by hand sanding parallel to the grain with a hand block.

Veneer Inlay Tools

You only need a few simple tools to do veneer inlay on a piece of wood. To begin, you need a knife with a razor sharp blade to cut the inlay design out of the veneer. The knife is also used to transfer the inlay design to the wood where it is to be placed. A 1/4-inch chisel is needed for cutting the inlay cavity once it’s transferred to the wood. After the inlay is glued into the cavity, a handheld rotary tool with a sanding accessory is used to sand the inlay flush. From here, a hand sanding block is used to finish.

Veneer Inlay Technique

Draw a design for your inlay on a piece of wood veneer. The veneer should be between 1/16 and 1/8 inch in thickness. Place the veneer flat on a worktable. Use the razor knife to cut out the design. Place the cut-out veneer inlay on the wood where you wish to add it. Use the razor knife to trace around the inlay, cutting to a depth of about 1/16 inch. Remove the inlay. Use the 1/4-inch chisel to cut and shave a hole for the inlay out of the wood. Test-fit the inlay. If it doesn’t fit, use a piece of sandpaper to sand off edges until it fits. Place wood glue in the hole. Tap the inlay into the cavity. When the glue dries, sand over the inlay with a handheld rotary tool with a sanding accessory.

a bit more on doing your inlays…

AIR TIGHT INLAYS.pdf (423.6 KB)
Custom Look Metal Inlay.pdf (3.3 MB)
DIY INLAY.pdf (991.6 KB)
Epoxy Inlay.pdf (522.6 KB)
Level Epoxy Inlays with a Ski File.pdf (71.1 KB)
Making An Inlay Template.pdf (97.5 KB)
making-bowtie-inlay.pdf (3.5 MB)

2 Likes

some shape laying out for your designs…

How to Draw an Ellipse.pdf (33.1 KB)
Drawing Circles by Keith Mealy.pdf (344.6 KB)

1 Like

Here are some takes on ideas on building your cabinets…

Guide to Custom Cabinets.pdf (2.4 MB)
Gussets.pdf (381.8 KB)

1 Like

the art of picture frames…

Length of Picture Frame.pdf (50.6 KB)
Make_Extra_Wide_Crown_Molding.pdf (1.0 MB)

1 Like

if you produce a lot of sawdust and it becomes problematic…
you live in a colder region of the United States…
a sawdust stove may be the solution…

SAWDUST STOVE.pdf (379.8 KB)

Or turn the sawdust into pellets for your pellet stove(s)…
What YOU need and how to make pellets…
To start, you need to have a supply of sawdust at around 10-15% MC to make your pellets form. It cannot be chunks, or sticks. It must be in a sawdust form to be put into the pellet mill.

The largest size entering the Pellet mill should be no larger than small wood shavings, and even that should be reduced whenever possible because the sawdust needs to be pressed through a flat die with small ¼’’/6mm holes to make the wood pellets… Pressing the sawdust through the die holes is what forms the pellets… What you put in the hopper must be small enough to go through the press’s holes…

Bigger pieces need to be run through a hammer mill or a grinder to grind them up into pulp… Hammer mills are the ticket w/ grinders being second choice…

Cardboard, paper and junk mail makes for fine pellets but regular wood sawdust is about as ready as you can get… (suggest you ‘‘sift’’ your sawdust to remove ‘‘chunks’’ and ‘‘pieces’’…

The process…

Moisture
Correct moisture content in your raw material is essential. Depending on how dry your raw material is you may have to add more moisture, or reduce it if the moisture is too high. Each batch is different… Most sawdust pelletizes best at around 10-15% MC… (some wood species bind better at around 20%MC)… A moisture meter is a must till you learn by ‘‘feel’’… trial and error is your best educator…

Binder
You’ll need a ‘‘binder’’ to make the sawdust ‘‘stick’’ together to form the pellets… It also acts like a lubricant during the pelleting process… During pelleting, heat will be generated which seals the binder and sawdust together, causing a hard-shell pellet to form…
You can buy commercial “Wood Pellet Binders”, use steam injection or just plain water to raise the sawdust’s MC…
Mix the binder and sawdust together prior to putting them in the pellet mill… There’s nothing like a motorized mortar or cement mixer for this job…

Heat
You will see steam rise from you mill, don’t be alarmed!!! This is a normal good thing… You do want to “seal in” that loss of heat though… Add more mixture to your pelletizer’s hopper so that it prevents the steam from escaping… This’‘steam’’ will act as a binder also… The pellets produced will come out extremely hot to the touch, like over 180 degrees… You will need to cool and dry them prior to use…

As your pellet mill is producing hard pellets, it will start to bog down… This is actually a good thing… You are now making the best pellets…
Increase your machine’s RPM’s to compensate for this…

Drying
Since most pellet stove like fuel to be around ≤8% moisture you will need to dry them… A simple flatbed w/ open air drying is usually sufficient and your pellets should be ready in a few hours… (unless the RH is at an insufferable index)… A framed 1/8~3/16’’ hardware cloth tray is most excellent… The dryer the pellets are, the more heat that will be produced…

Notes…

Sieve the finished pellets for chafe… Some pieces will fall apart or break during the process… Separate the chafe by sifting them through a screen…
Your drying trays can do this step… Reprocess the chafe…
Resinous/sappy woods sure do make a mess of your equipment and extra maintenance is mandatory…
Cabinetize your drying trays, add a dehumidifier to the cabinet… dry, ready to burn pellets like almost right now… speeds up production too…
Make sure the pellets have cooled before bagging…
Sealed plastic bags are your best bet…
1 Like

for those w/ kitchen islands and you wish to install a sink…
FWIW, it wouldn’t hurt to install a clean out in the 1st stand pipe…

Venting a Kitchen Island.pdf (383.4 KB)

1 Like